Here is a fun bag pattern that represents an Uluaq. Uluaq in Yup’ik translates to woman’s knife. Below is the translation of uluaq taken directly from the Yup’ik Eskimo dictionary which can be found here at this LINK
uluaqtraditional Eskimo woman’s knife shaped like a broad wedge set in a handle opposite the arc- shaped edge; semi-lunar knife; any type of knife (CAN meaning) # sometimes called ‘ulu’ in English, from the Inupiaq name for this kind of knife; the sharp edge of an uluaq is its kegginaq, the handle is its egkuaq; uluakun ulligciuq ‘she is cutting fish for drying with a semi-lunar knife’; Urluvminek- gguq tauna tan’gaurluller tegumiarrarluni. Tauna-llu-gguq aipaa nasaurluq uluamek. Nanikuangengamek taum tan’gaurlullraam tauna nasaurluq pillinia, “Uluarpegun kepqerru.” ‘The little boy clutched his bow and arrow and the girl her semi-lunar knife’. When they panicked, not knowing quite who to do, the boy told the girl, “Cut it with your semi-lunar knife.”’ (PAI 2008:400); NS, Y, NI, NUN, CAN, K, BB, NR, LI;cf. ulu; > uluara-, ulurpak; < PE ulu(3) and ulu3a3
Sew Yup’ik Uluaq Bag Pattern
The image above is what your uluaq bag will look like. You can create your uluaq bag however you would like. You can add a separate material for the handle. You can embellish it with qupak designs. Here is this video on my Sew Yup’ik YouTube channel I show you how I make my qupaks CLICK HERE
To make this bag pattern you will need:
Material for the outside, the uluaq bag pattern is 19″ wide by 12.5″ height
Material for the inside, the uluaq bag pattern is 19″ wide by 12.5″ height
And interfacing, I personally like to use 987F Pellon Fusible Interfacing when making these bags
10″ zipper or longer
And then sewing machine, coordinating thread
To make the handle you can utilize scrap material as well, I like to make my straps 2.5″ wide and iron in a fold, and then sew them together and the length is up to your liking
(I will share this in the video on my Sew Yup’ik Youtube Channel)
You can mix and match your material if you wanted to use scrap fabric for the outer material and liner material
Here is the downloadable PDF pattern to use. You will need to print it on two pages and then tape the handle to the blade pattern.
Once you have the material, and the pattern printed please refer to my Sew Yup’ik Youtube channel for the instructional video. The video can be found here: https://youtu.be/6nAmDHRIuxo
When I have the time I will create a written downloadable instructional outlining the steps. For now please refer to my Sew Yup’ik Youtube Channel here: https://youtube.com/@SewYupik
Quyana for downloading this Sew Yup’ik Uluaq bag pattern. I hope you had fun creating your own uluaq bag and please if you make one and share it online tag me Sew Yup’ik. I am on Facebook, Instagram, TikTok, Twitter, and Youtube.
This pattern graphic, the photos and the instructions are copyright Nikki Corbett at Sew Yup’ik. Please do not copy, publish, sell, redistribute or alter them in any way. Please do not rebrand this work as your own and sell or give it away, even if altered. This is intended for your personal use. If you would like to recommend these instructions, please pass on the original download link at Sew Yup’ik . Thank you for your understanding.
Usage – you ARE allowed to use this pattern to make things to sell on a small handmade basis, such as for craft fairs and for your Etsy shop. However it may not be used for larger scale commercial purposes without a commercial license
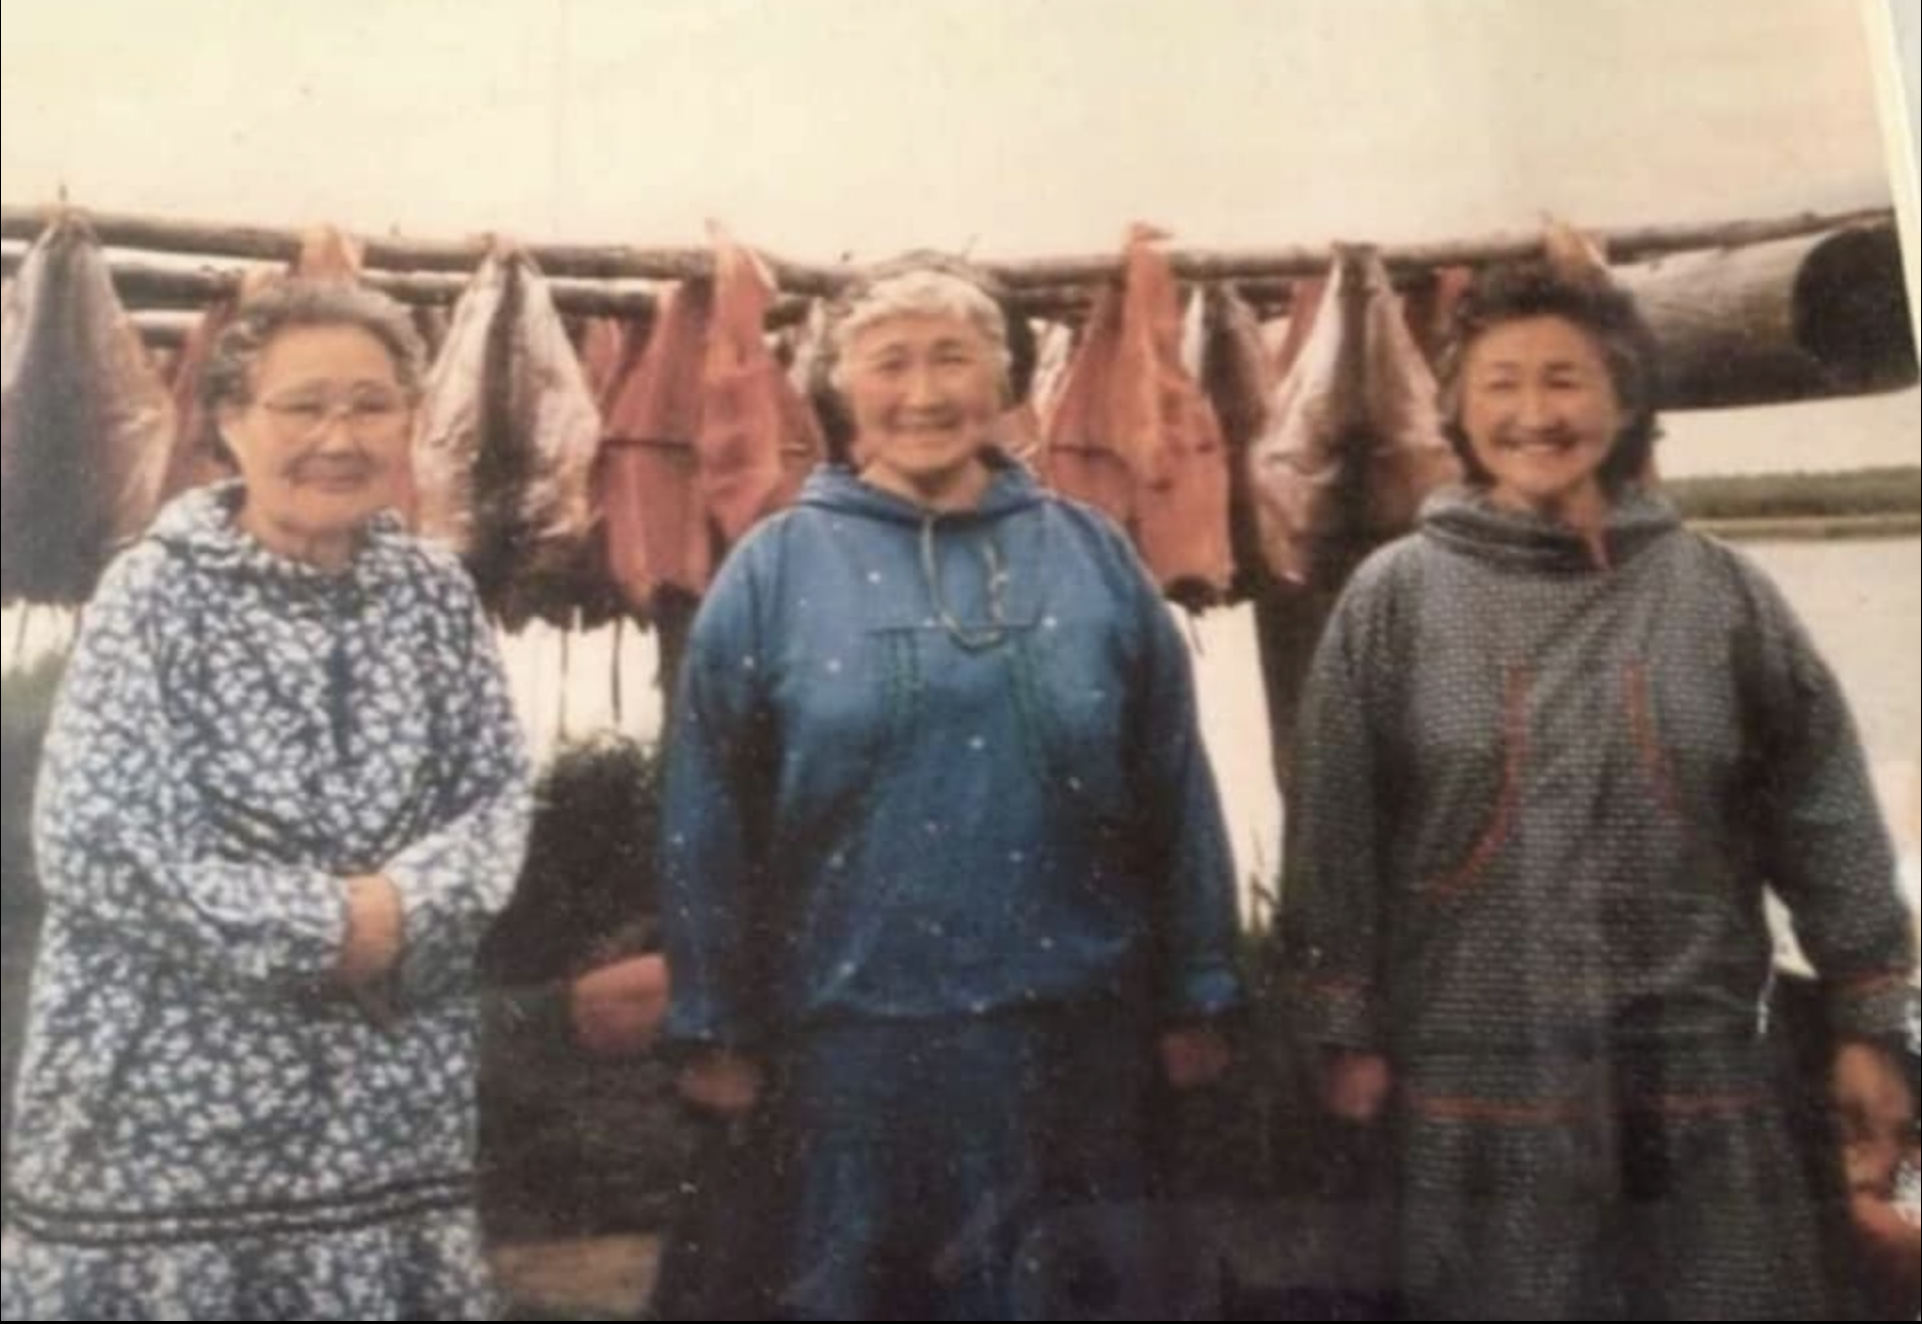
To say that I am grateful is an understatement. I feel very fortunate to have been able to see a portion of the amazing Yup’ik collection of handmade items by master artists from around the state and The Yukon Kuskokwim Area.
My focus while visiting The Alaska Native Heritage Center was to view piluguk (hard sole bottom books), teggumiaqs (dance fans), nasqerrun (headdress), traditional necklaces, and other skin sewn items. Since I have hit restart on my skin sewing journey I have been focusing piluguk because that was my first big sewing project I wanted to complete. I completed my first piluguk at the end of March thanks to a project funded by The CIRI Foundation.
With each beautiful handmade item I felt an a sense of peace. Viewing the Yup’ik collection of handmade clothing wear brought me so much joy and also sparked the connection again to start hand sewing again. I lost that spark after my brother passed on March 28th, 2023. After completing my first pair of piluguk I was on cloud 9 and that feeling was replaced with grief and immense sadness. I have been slowly making my way back to skin sewing and sewing but now it has become more important because it is healing my soul.
Skin sewing has brought me closer to my grandmother Narull’aq and aunt Tun’aq. I have felt more connected to them since I started getting serious of skin sewing and it has been an amazing feeling. To be able to create with guidance of my grandmother’s handmade clothing wear has been an honor. And my visit to The Alaska Native Heritage Center brought on that same sense of feeling. These opportunities have allowed me to grow as an artist in so many ways and for that I am forever grateful. I know going forward I will pave the way for my skin sewing journey and I can’t wait to share that with my children, grand children and future generations to follow. I hope that I can lead by example and show that anything is possible if you put your mind to it. Follow your dreams and stay true to yourself. And as always remember where you came from.
Quyana Cakneq again to The CIRI Foundation, The Alaska Native Heritage Center, Museums Alaska. And most importantly quyana to our ancestors who have walked this earth before us and led by example.
piluguk skin boot (LY, HBC, NI, CAN, LK, BB meaning); clothing (NSU meaning) # and pilugug– to put on footwear; to dress # pilugugtuq ‘he is putting on footwear’; pilugugaa ‘he is putting footwear on him’ / in areas where both piluguk and kameksak (q.v.) are used for skin boot, piluguk is used for boots that go higher up the calf; piluguugka ‘my skin boots’; Aturangqerrluteng yup’igtarrlainarnek pilugungqerrluta, ivrucingqerrluta-llu. Yup’igtarrlainarnek sap’akirtaunani-ll’ enurnapiarluteng. ‘They had only Yup’ik style clothing, skin boots, and wading boots. Only Yup’ik style, no (western style) shoes, which were very hard to come by then.’ (KIP 1998:105)
I didn’t grow up watching my grandmothers, aunties or mom work on piluguk. I had never watched anyone making piluguk but I knew that when I got older and into sewing I was going to make my dreams come true.
In 2015 I purchased my nat’raq from I think family out in Chefornak. And by I think I mean maybe he is an uncle but I am not sure the relation and as I write this. But I purchased in hopes of learning how to make piluguk from an elder in Nunapitchuk. But I didn’t make the time to try and learn and I missed my opportunity because she passed a few years ago. And I put my dreams on the back burner.
nat’raq, nateraq(NSU form) sole of skin boot; special oversole used to prevent slipping on ice
naterkaq sole material for skin boots, made from the tanned skin of the bearded seal
Here is the nat’raq that I purchased in 2015. Nat’raq is tanned bearded seal skin used for hard sole bottoms.
But then I had an opportunity to apply for a grant with The CIRI Foundation as an extension from my ARTShop grant that I received and I jumped at it. I began my search to find a teacher who would be willing to teach me. And just my luck I had a cousin (don’t ask me how but we are related) reach out and she said she was willing to teach me. I was excited beyond belief. I began my shopping for piluguk making supplies. Here is the list and I will expand on it more as I remember :
Calfskin
River Otter or sheared beaver or sea otter
Yarn for ciivaguat and strings
ciivaguatblack beads between the decorative stitching on the calfskin panels of a traditional Yup’ik parka # literally: ‘things like flies’; < ciivak-uaq plural
Beads if you want to decorate your piluguk
Glover skin sewing needles size 5, 6, 7 (the smaller size is better for when you working on hard sole)
Thread for skin sewing
Wax for thread
Corduroy for the top of the piluguk
And lining material
And nat’raq
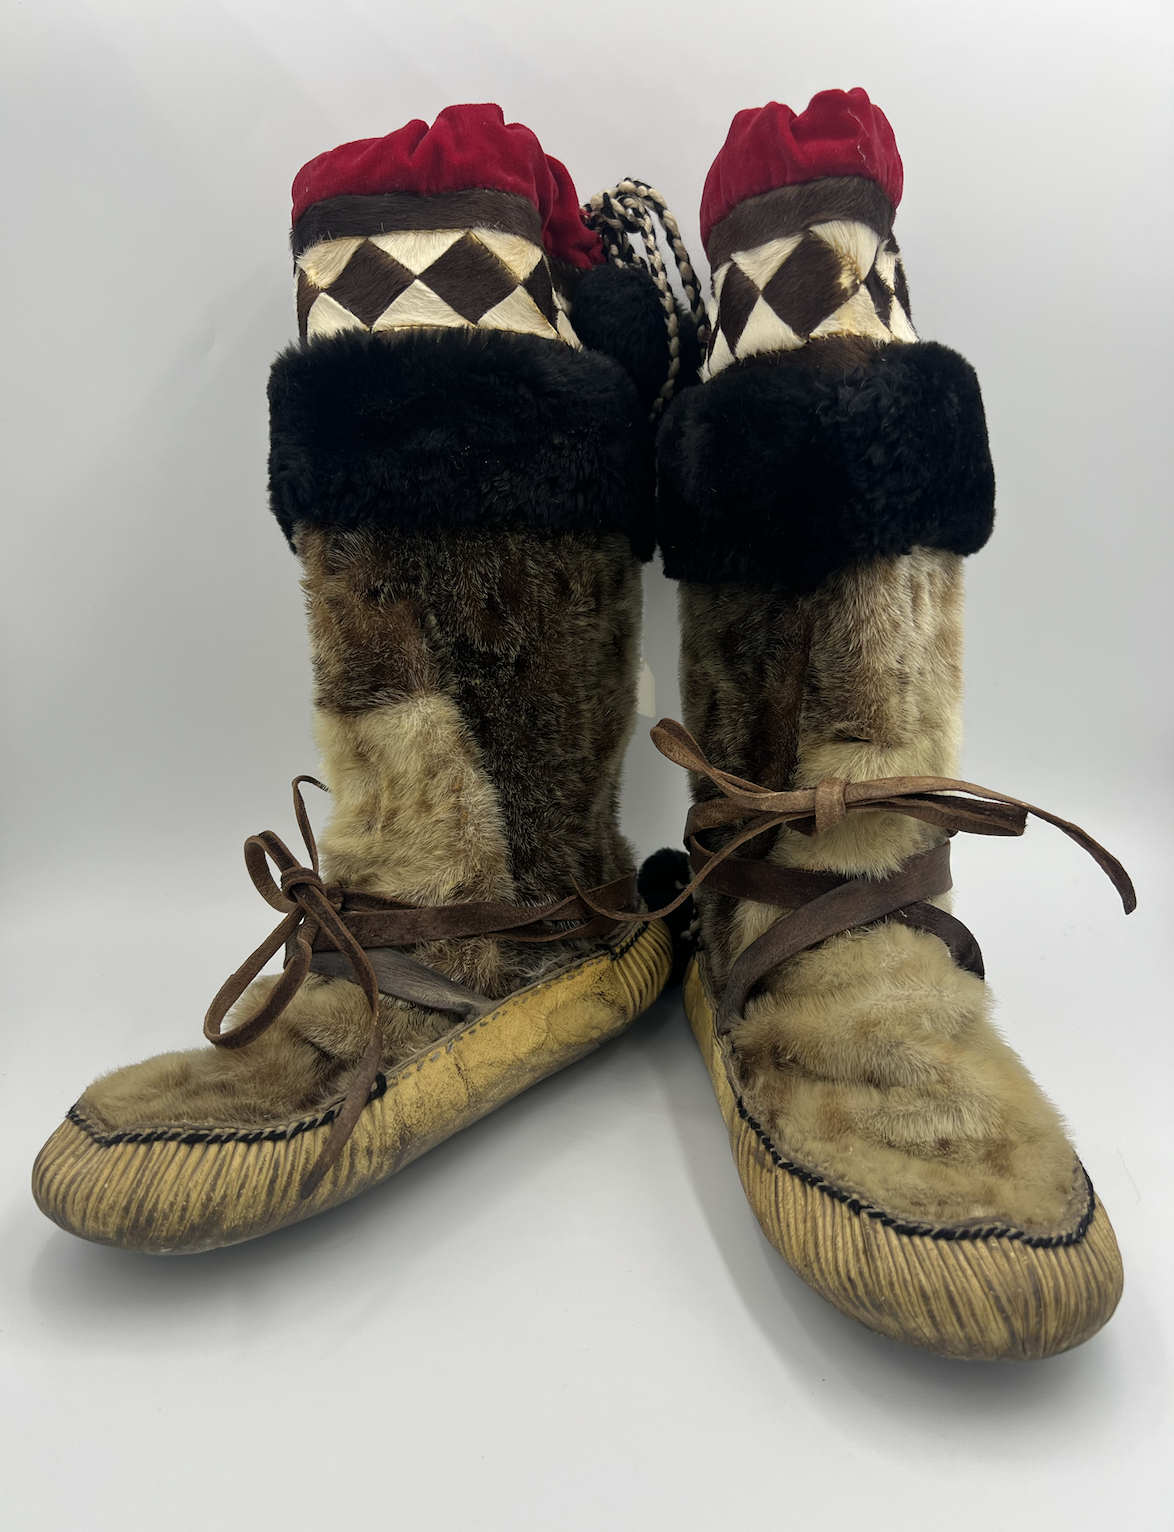
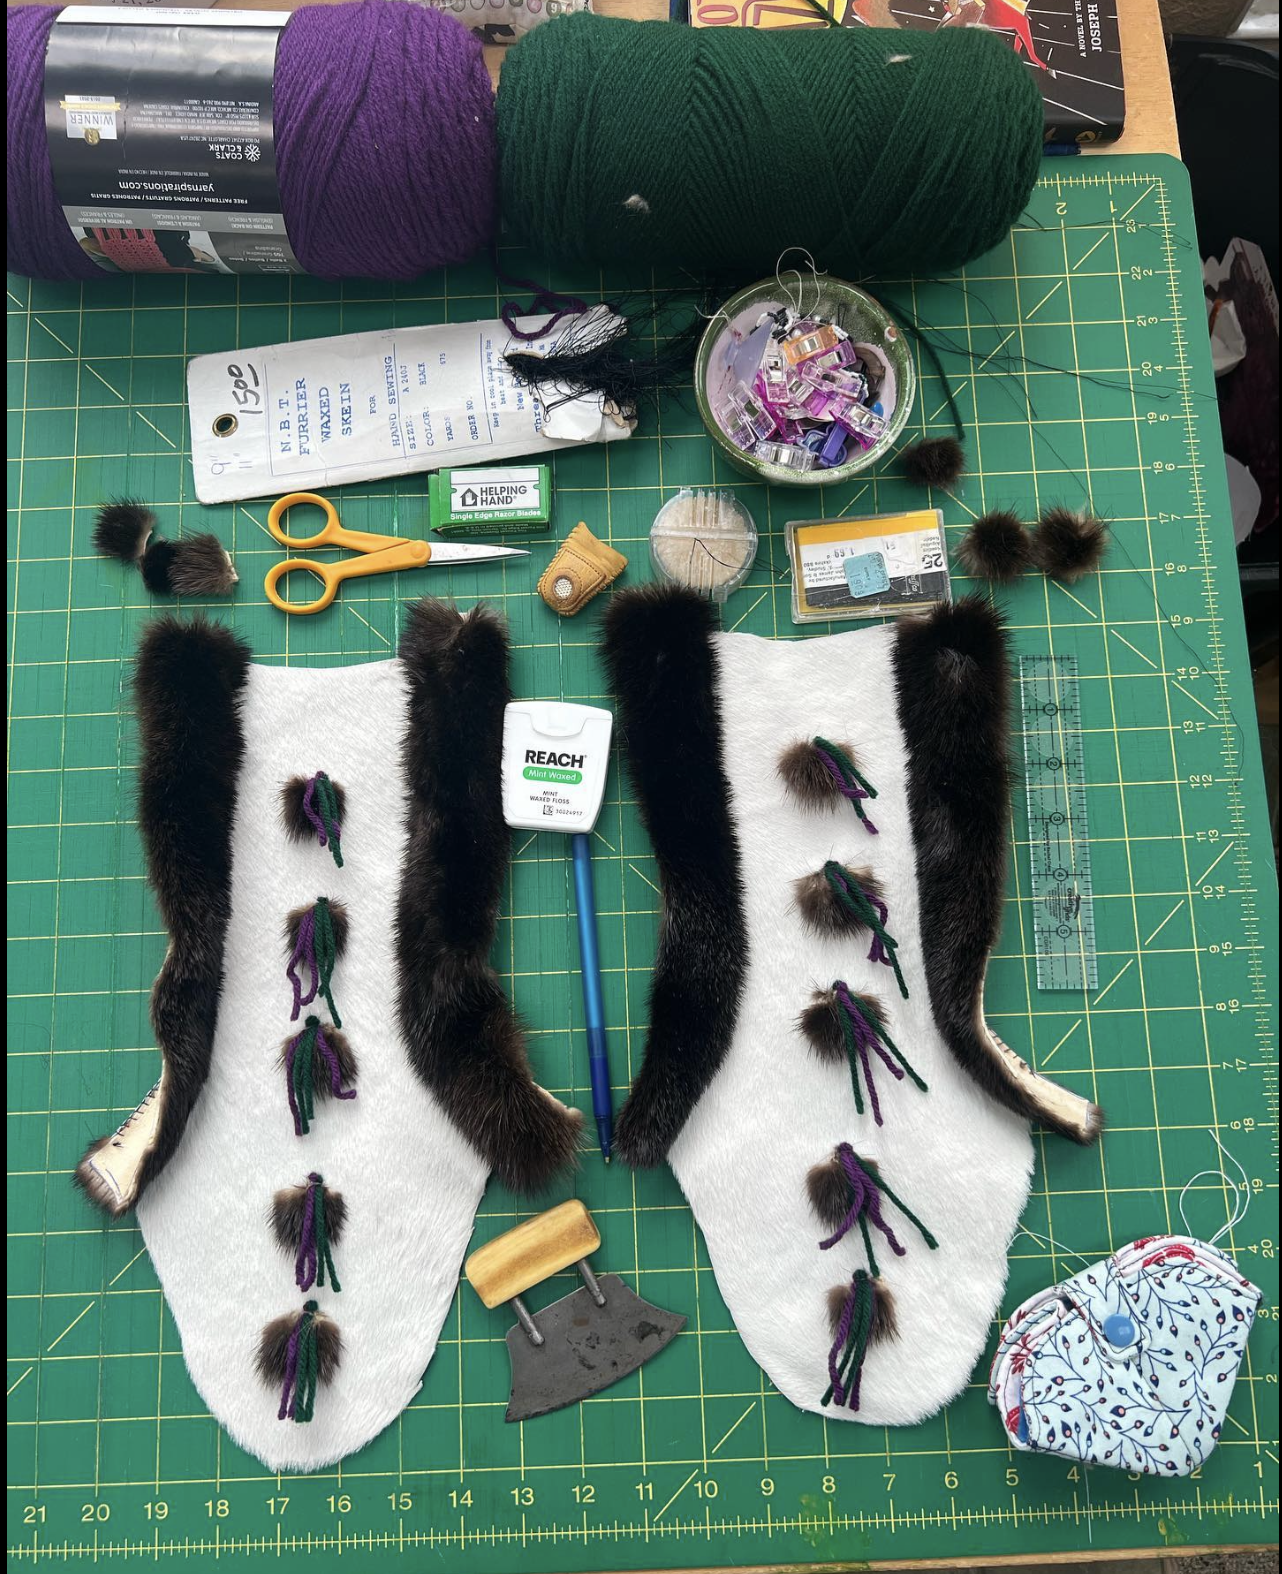
Here are my piluguk in the making with the supplies that I used in the process.
My pattern I used was shared with me from Margaret Dillon of Kuiggluk who got the pattern from Mary Anaver of Qipneq. I am thankful for the pattern sharing and I am willing to share with anyone interested please send me a message at sewyupik@gmail.com and I can share the pattern that I have.
Margaret guided me as I started my piluguk making over text and FaceTime. And when I first started my project I began documenting it on my Sew Yup’ik Facebook Page, Sew Yup’ik Instagram and Sew Yup’ik TikTok. I was very nervous to start and was even more nervous because I was opening the door to have people watch me as I started my sewing. But after I made the first initial cut and it started coming together I became more confident. And that fear turned to excitement with each stitch. With Margaret’s guidance I was also using a pair of my grandmother piluguk that she created. I felt so close to my grandmother while working on my piluguk and it made me miss her even more. But I was thankful to have her piluguk that she created and used them as the ultimate guide. I knew when I made my first pair I wanted to replicate a pair that my grandmother Elena made.
My grandmothers Elena Nick “Narullaq,” Sophie Nicholas, and Eliza Chase “Mikaq”
This was my process of sewing together the piluguk:
Once you gather together the supplies then you will decide where you want to put your piluguk from the calf skin. You always want to make sure that the calfskin is going down. Once you cut out the calfskin then you will decide if you want to decorate it with ciivaguat.
Decide what you want to use for the sides, I used river otter just like my grandmother. I also used river otter for the top portion. For measurements I measured my grandmothers and used hers.
Decorate your calfskin with ciivaguat (river otter), yarn, beads. And then I added the two strands of beads on each side of the front.
When I sewed on the yarn pieces I made them longer, and then I cut them down to the size I liked.
After you decorate the front and back. You will sew on the strips of river otter tails to the calfskin starting from the bottom. Sew those pieces on the front calf skins. After attached to both sides, now you sew on the back piece calfskin.
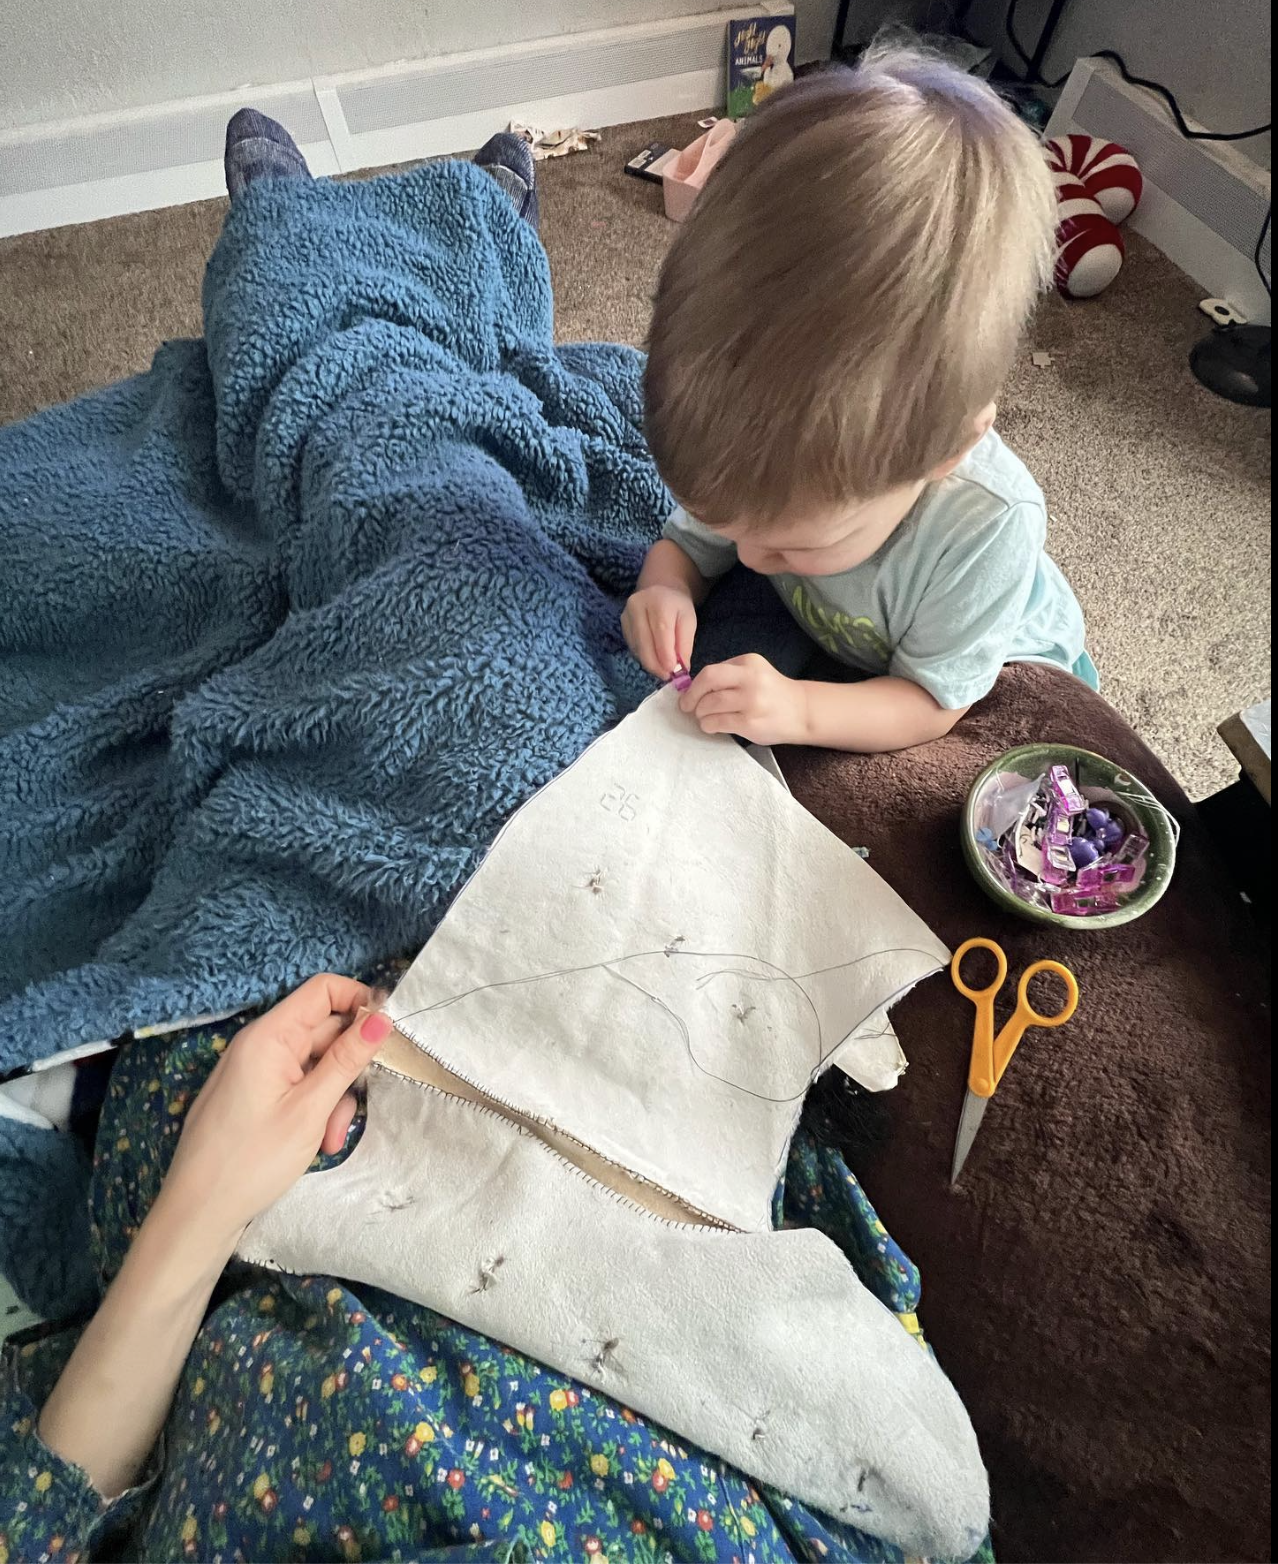
My son helping me sew together my piluguk. Here is where I attached the river otter tails (1″ wide) to the front of the calfskins.
Once they are assembled, you will sew the river otter top pieces.
I decided to turn them then at this point and measure to make the liners. I made my liners out of quilted material.
I was thankful to be able to spend a weekend with Margaret in Homer while I worked with my piluguk with her guidance.
7. After I sewed the liners together I then attached them onto the calfskin on the inside. I made sure to leave a little space for when the nat’raq was going to be sewn on.
8. And then I cut out the corduroy tops and sewed those onto the piluguk.
Here are my completed piluguk without the corduroy tops.
9. Once you have assembled all the outside pieces at that point you will now cut out the nat’raq to match your piluguk.
Here are my piluguk and nat’raq cut ready to be crimped. To keep your nat’raq from rotting you get them wet and put them in the freezer until ready for use.
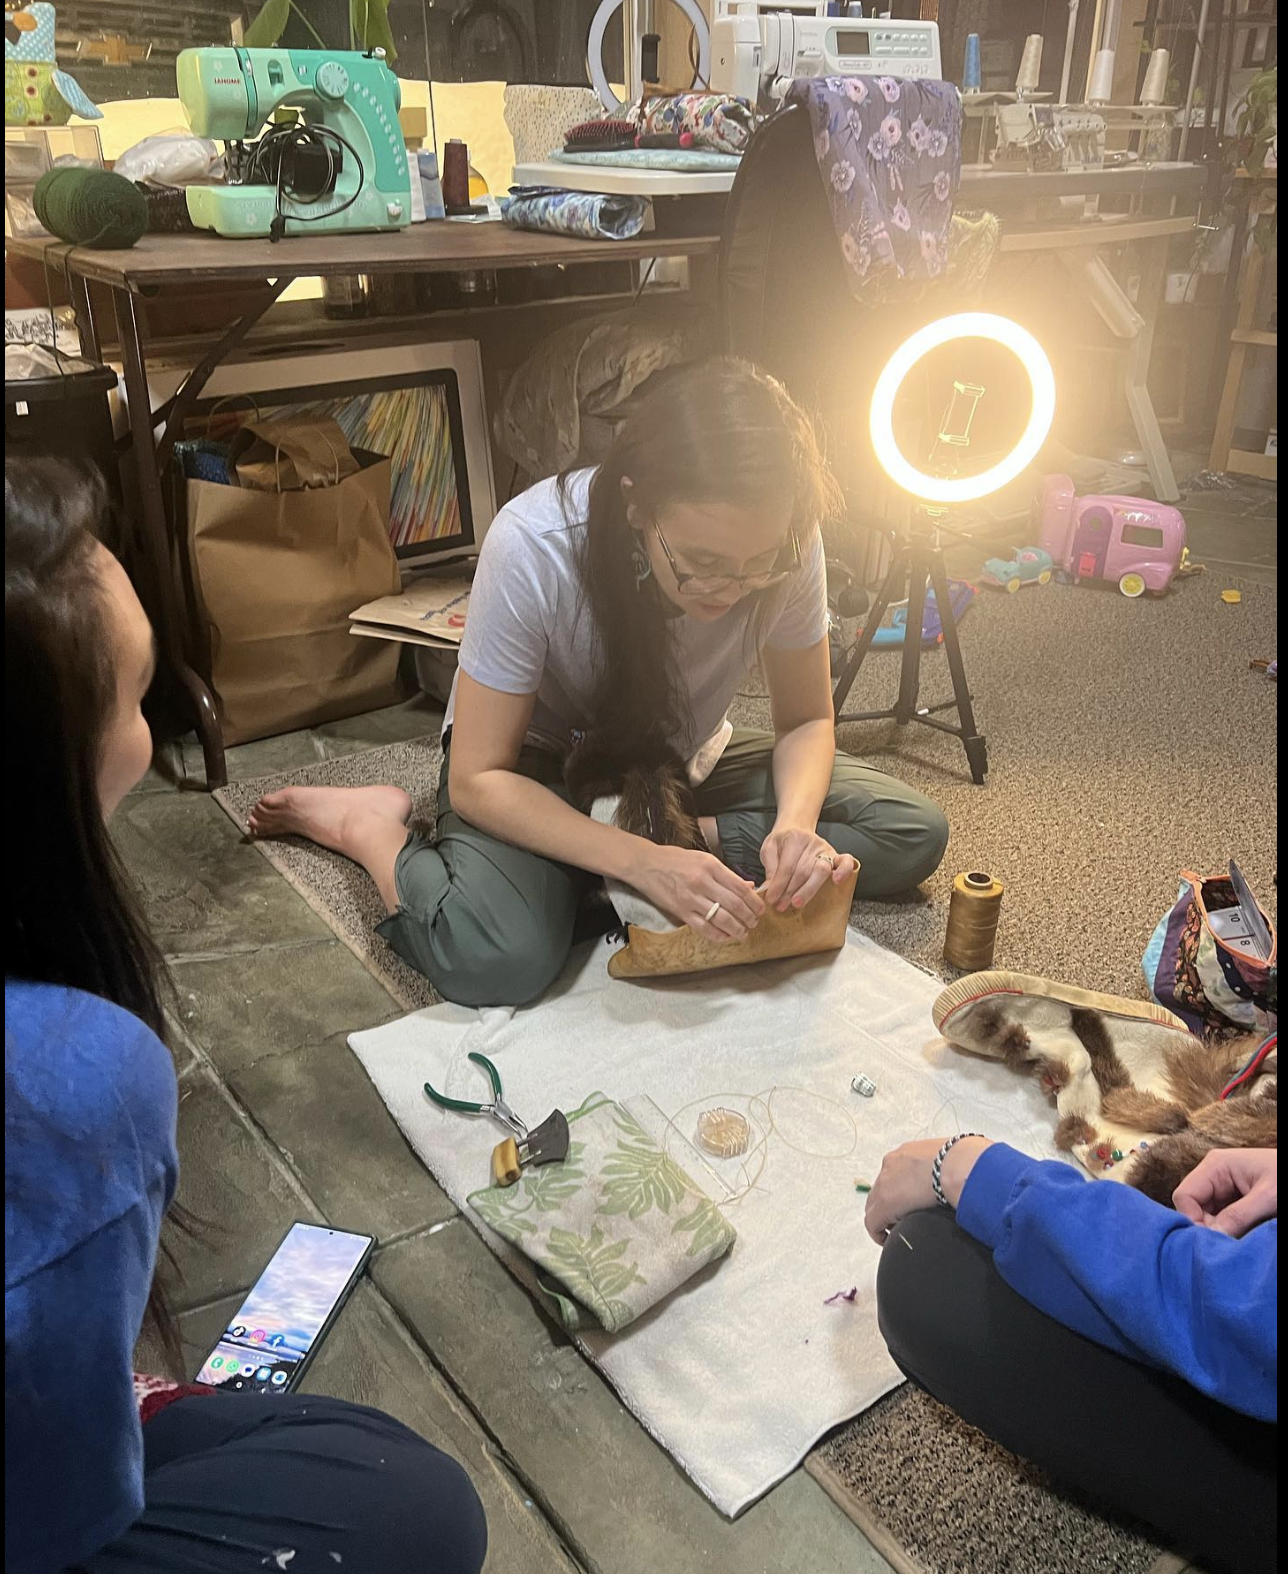
And then here comes the hardest part, crimping the nat’raq using a small uluaq. This part almost had me wanting to quit because I kept comparing my crimps to my grandmothers. I discovered with the commercially tanned bearded seal might be too thin and it was easier to work on while it was more dry. Traditionally you wet the nat’raq and then you are able to crimp them. Aka tamani (a long time ago) they used their teeth and a small uluaq to crimp. Nowadays with the new tools there are crimping tools out there that you can use.
Here is my first time crimping. I am so thankful to my teacher Margaret for showing me how. I have a lot to learn but I am so grateful that I have my first pair of piluguk under my belt and I am excited to keep sewing. Throughout the process I shared videos on my Sew Yup’ik social platforms. Please check them out if you would like to see more. I am hopeful one day that I will be able to share this knowledge and teach it in classes. For now I am going to just keep trying and I hope that my crimps will be someday as good as my grandmothers.
Here are my first crimps. This is when I discovered it was easier to work with my nat’raq when it was more dry vs. wet. I was so excited to share my first side. It was not great but I was thankful to start. My first pair of piluguk completed. I decided to try my hand at teeth crimping on my second pair and actually enjoyed using my teeth to crimp. Wearing my piluguk for the first time in Mamterrilleq.
I am so thankful to The CIRI Foundation and my piluguk teacher Margaret for making this possible. I am thankful to my grandmothers who were incredible sewers and seamstresses. I am thankful that I was able to replicate a pair of piluguk from my grandmother for my first time. And most of all I am thankful to my family who is always supportive especially my aipaq.
Quyana! Don’t be scared to start something new. Don’t wait until it’s too late. If you have someone willing to teach you how to make a craft take the time and listen before it’s too late.
As I was sharing around resources to my friends and family for various areas of need I thought why not share them with all of you.
This first micro grant is with the Division of Agriculture for the Food Security program. I just applied because I have been wanting to put a fish camp in my backyard and if I receive the funding that would be covered by the micro grant. There are many other areas in which you could apply the funding. Check out the link HERE.
The Alaska Housing Finance Corporation is hosting another ground of applications for their rent relief and homeowners assistance. Check this LINK to see if you qualify for their application. I don’t believe that my household qualifies but I was checking anyways.
Check out the Emergency Broadband Benefit to see if you qualify for assistance with your broadband services. Check out the link HERE.
Go to your local library and sign up for a library card. I believe if you don’t have a library you can choose the nearest library and sign up through them. Once you’ve signed up you can go download the Libby App. Input your library card and you can listen to audio books for free if your library carries then and then you can also download books to read on your phone. I believe you have a week to listen to the audiobook or read the book on your phone but it is pretty neat. And honestly I don’t know what else it can do I just downloaded it today and started listening to Michelle Obama’s audiobook so I am still learning.
We also discovered our local library Soldotna Library is giving out free seeds to start your gardens. Check out this Facebook post for more information if you are in the Soldotna area. We picked out our five packets and we are going to try our hand at that green thumb again. Every year we yield a few more peas, and a couple strawberries but I would like to try and see if we can get more than 6 peas and 4 strawberries.
And if you are an artist check out Cerf+ The Artists Safety Net. They provide artist relief grants and you don’t want to miss out on applying. Check out their website HERE.
And please if you know of any other resources please share in the comments.
Quyana Chuck Norris!
Here is a recent photo when we were flying to Anchorage from Bethel.
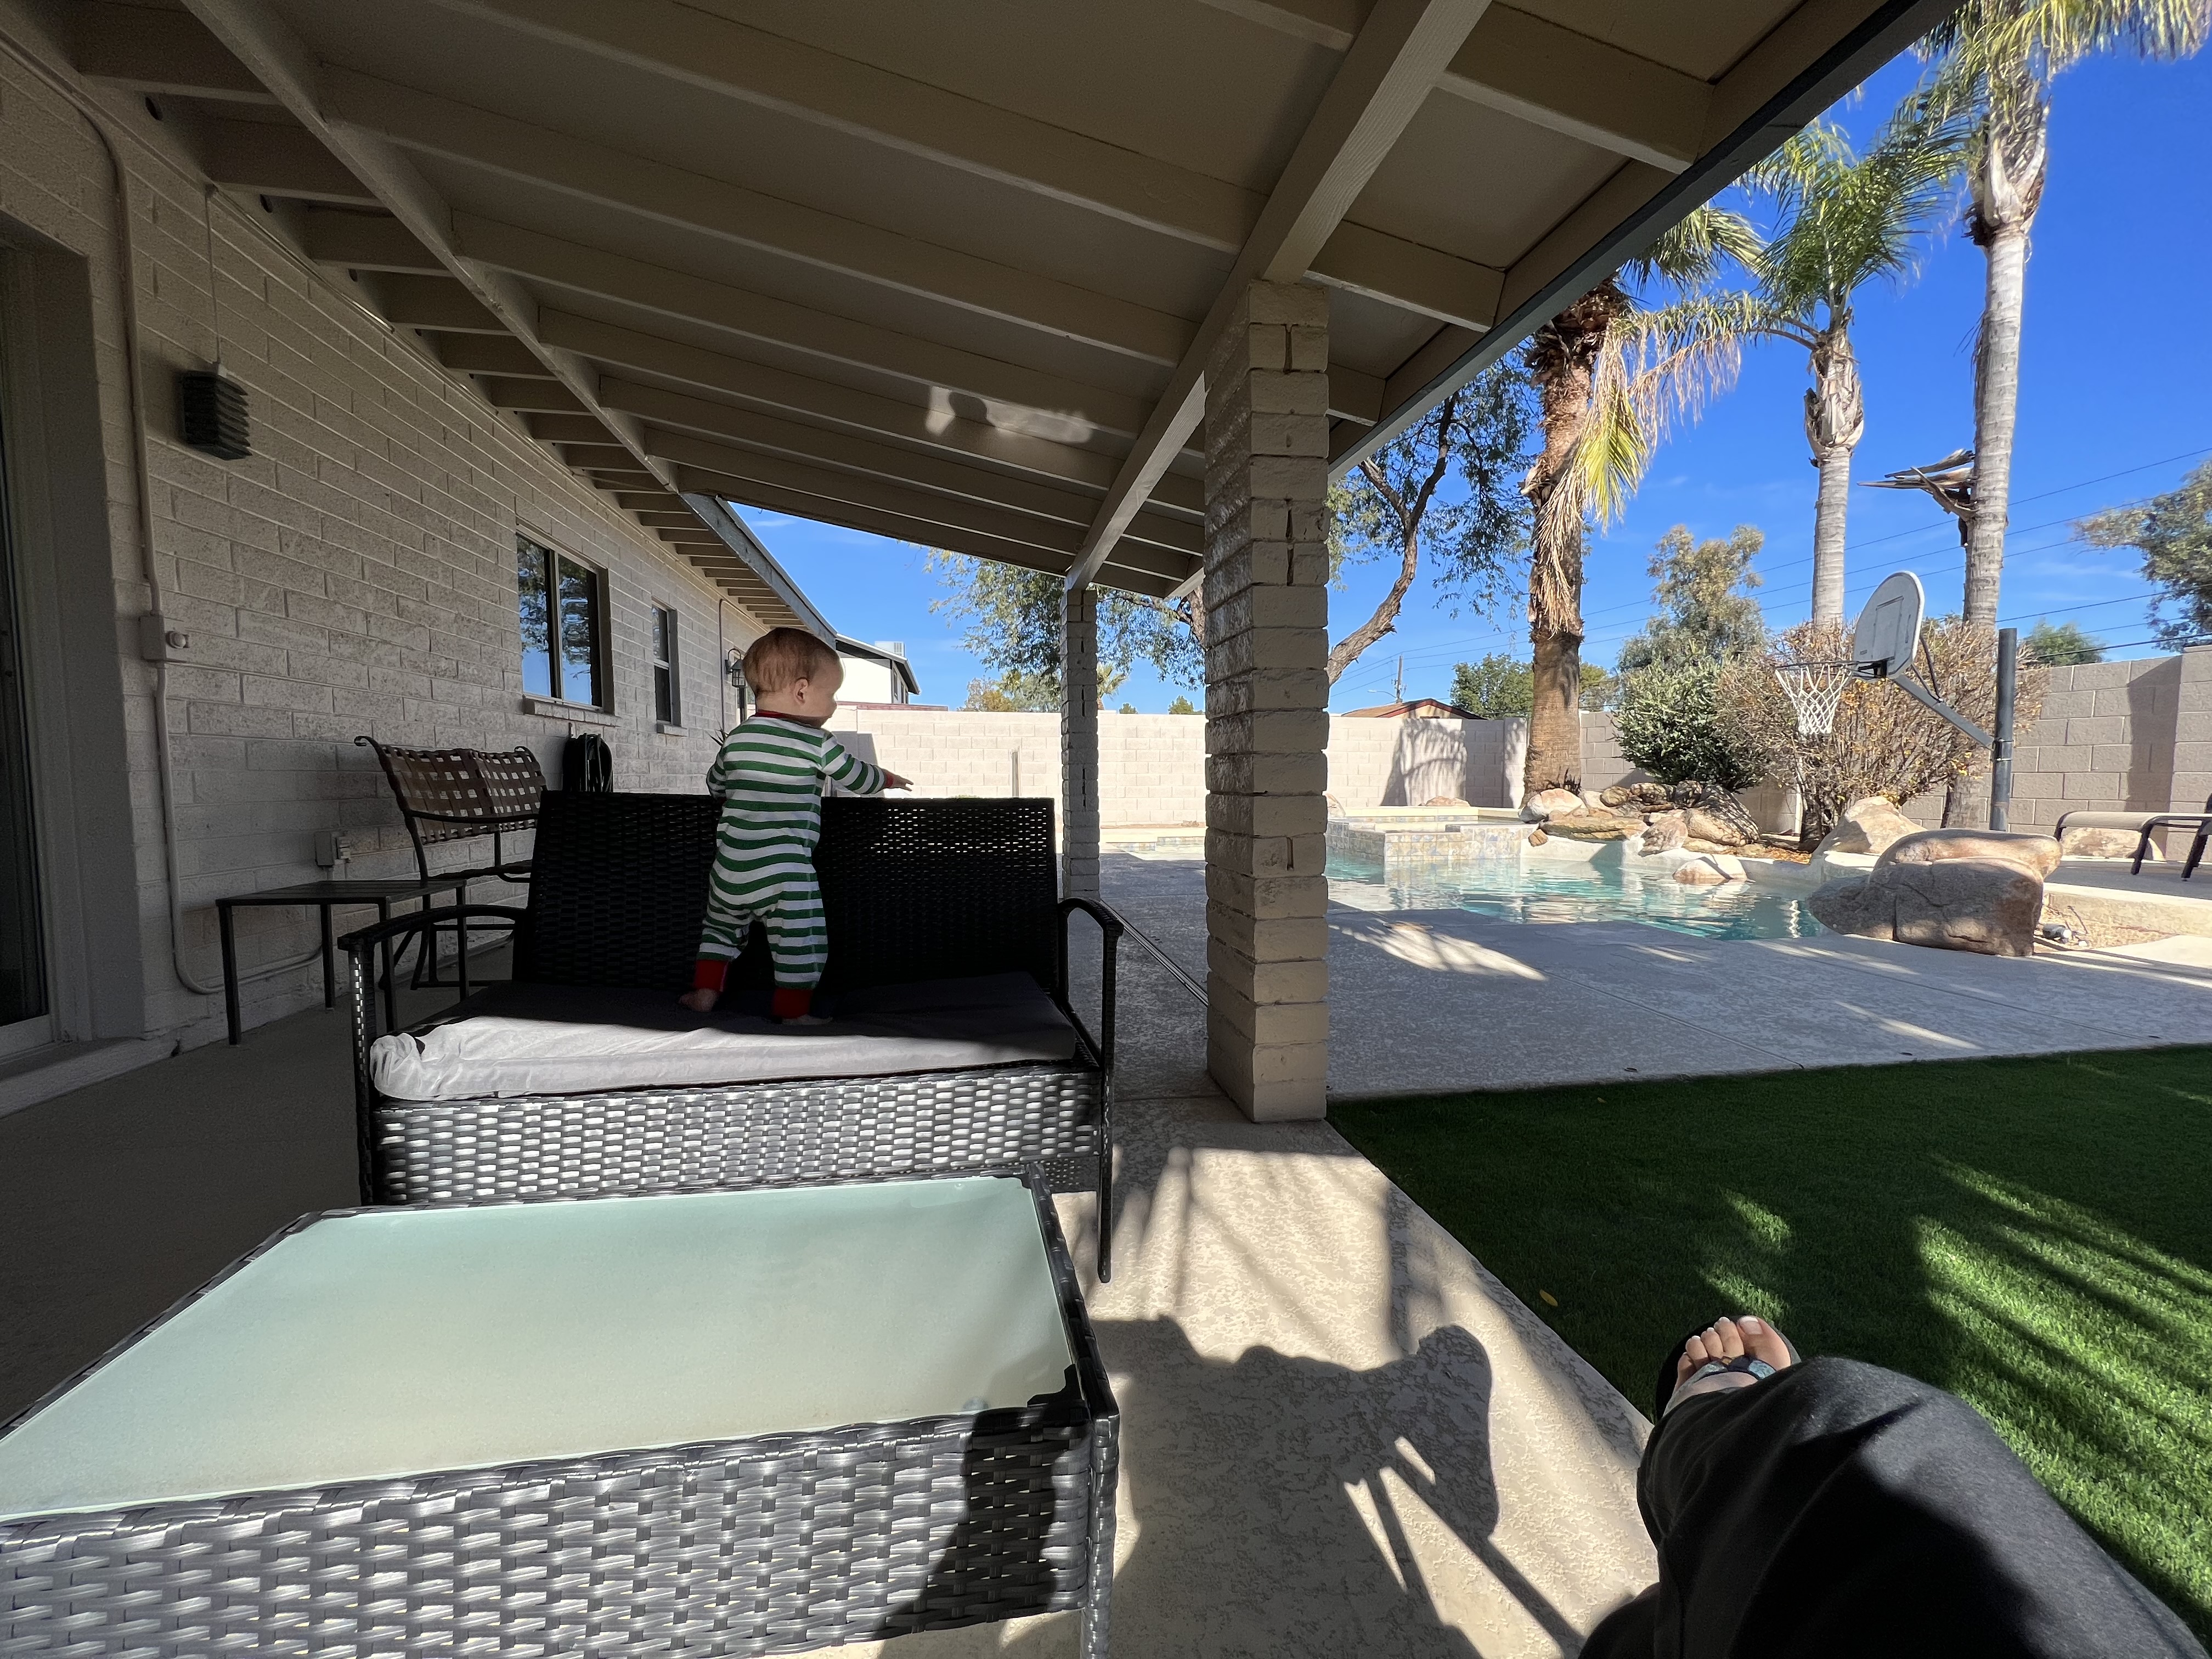
I am finally feeling myself again after our crazy Arizona adventure and ready to share all the fun things we did around Phoenix. We had initially planned our trip for 10 days and then it got extended to 17 days thanks to Omnicron and the storms in the Pacific Northwest. For those first 10 days I jam packed our days with adventures in the morning and relaxing by the pool in the afternoons. If you have teens or little ones renting a house with a pool is a must.
Our first Airbnb in Glendale
In our 10 days we visited the Desert Botanical Gardens accompanied with a photo shoot, the Phoenix Zoo, The Hole in the Rock, Butterfly Garden, McCormick-Stillman Railroad Park, Odysea Aquarium, Glendale Glitters, Piestewa Peak Hike, and Tom’s Thumb Hike. And I cannot forget to share the most amazing tacos from Cocina Madrigal.
If you have little ones and they enjoy the zoo and animals I recommend checking out the Phoenix Zoo. With our huge family I found tickets on Groupon for cheaper than the admissions price. We found ours on Groupon for $23 a piece and if you purchase them at the zoo they are $29.95 for adults or $19.95 for children. They also have these sweet little animal rides called Rydables and you can rent them by the minute.
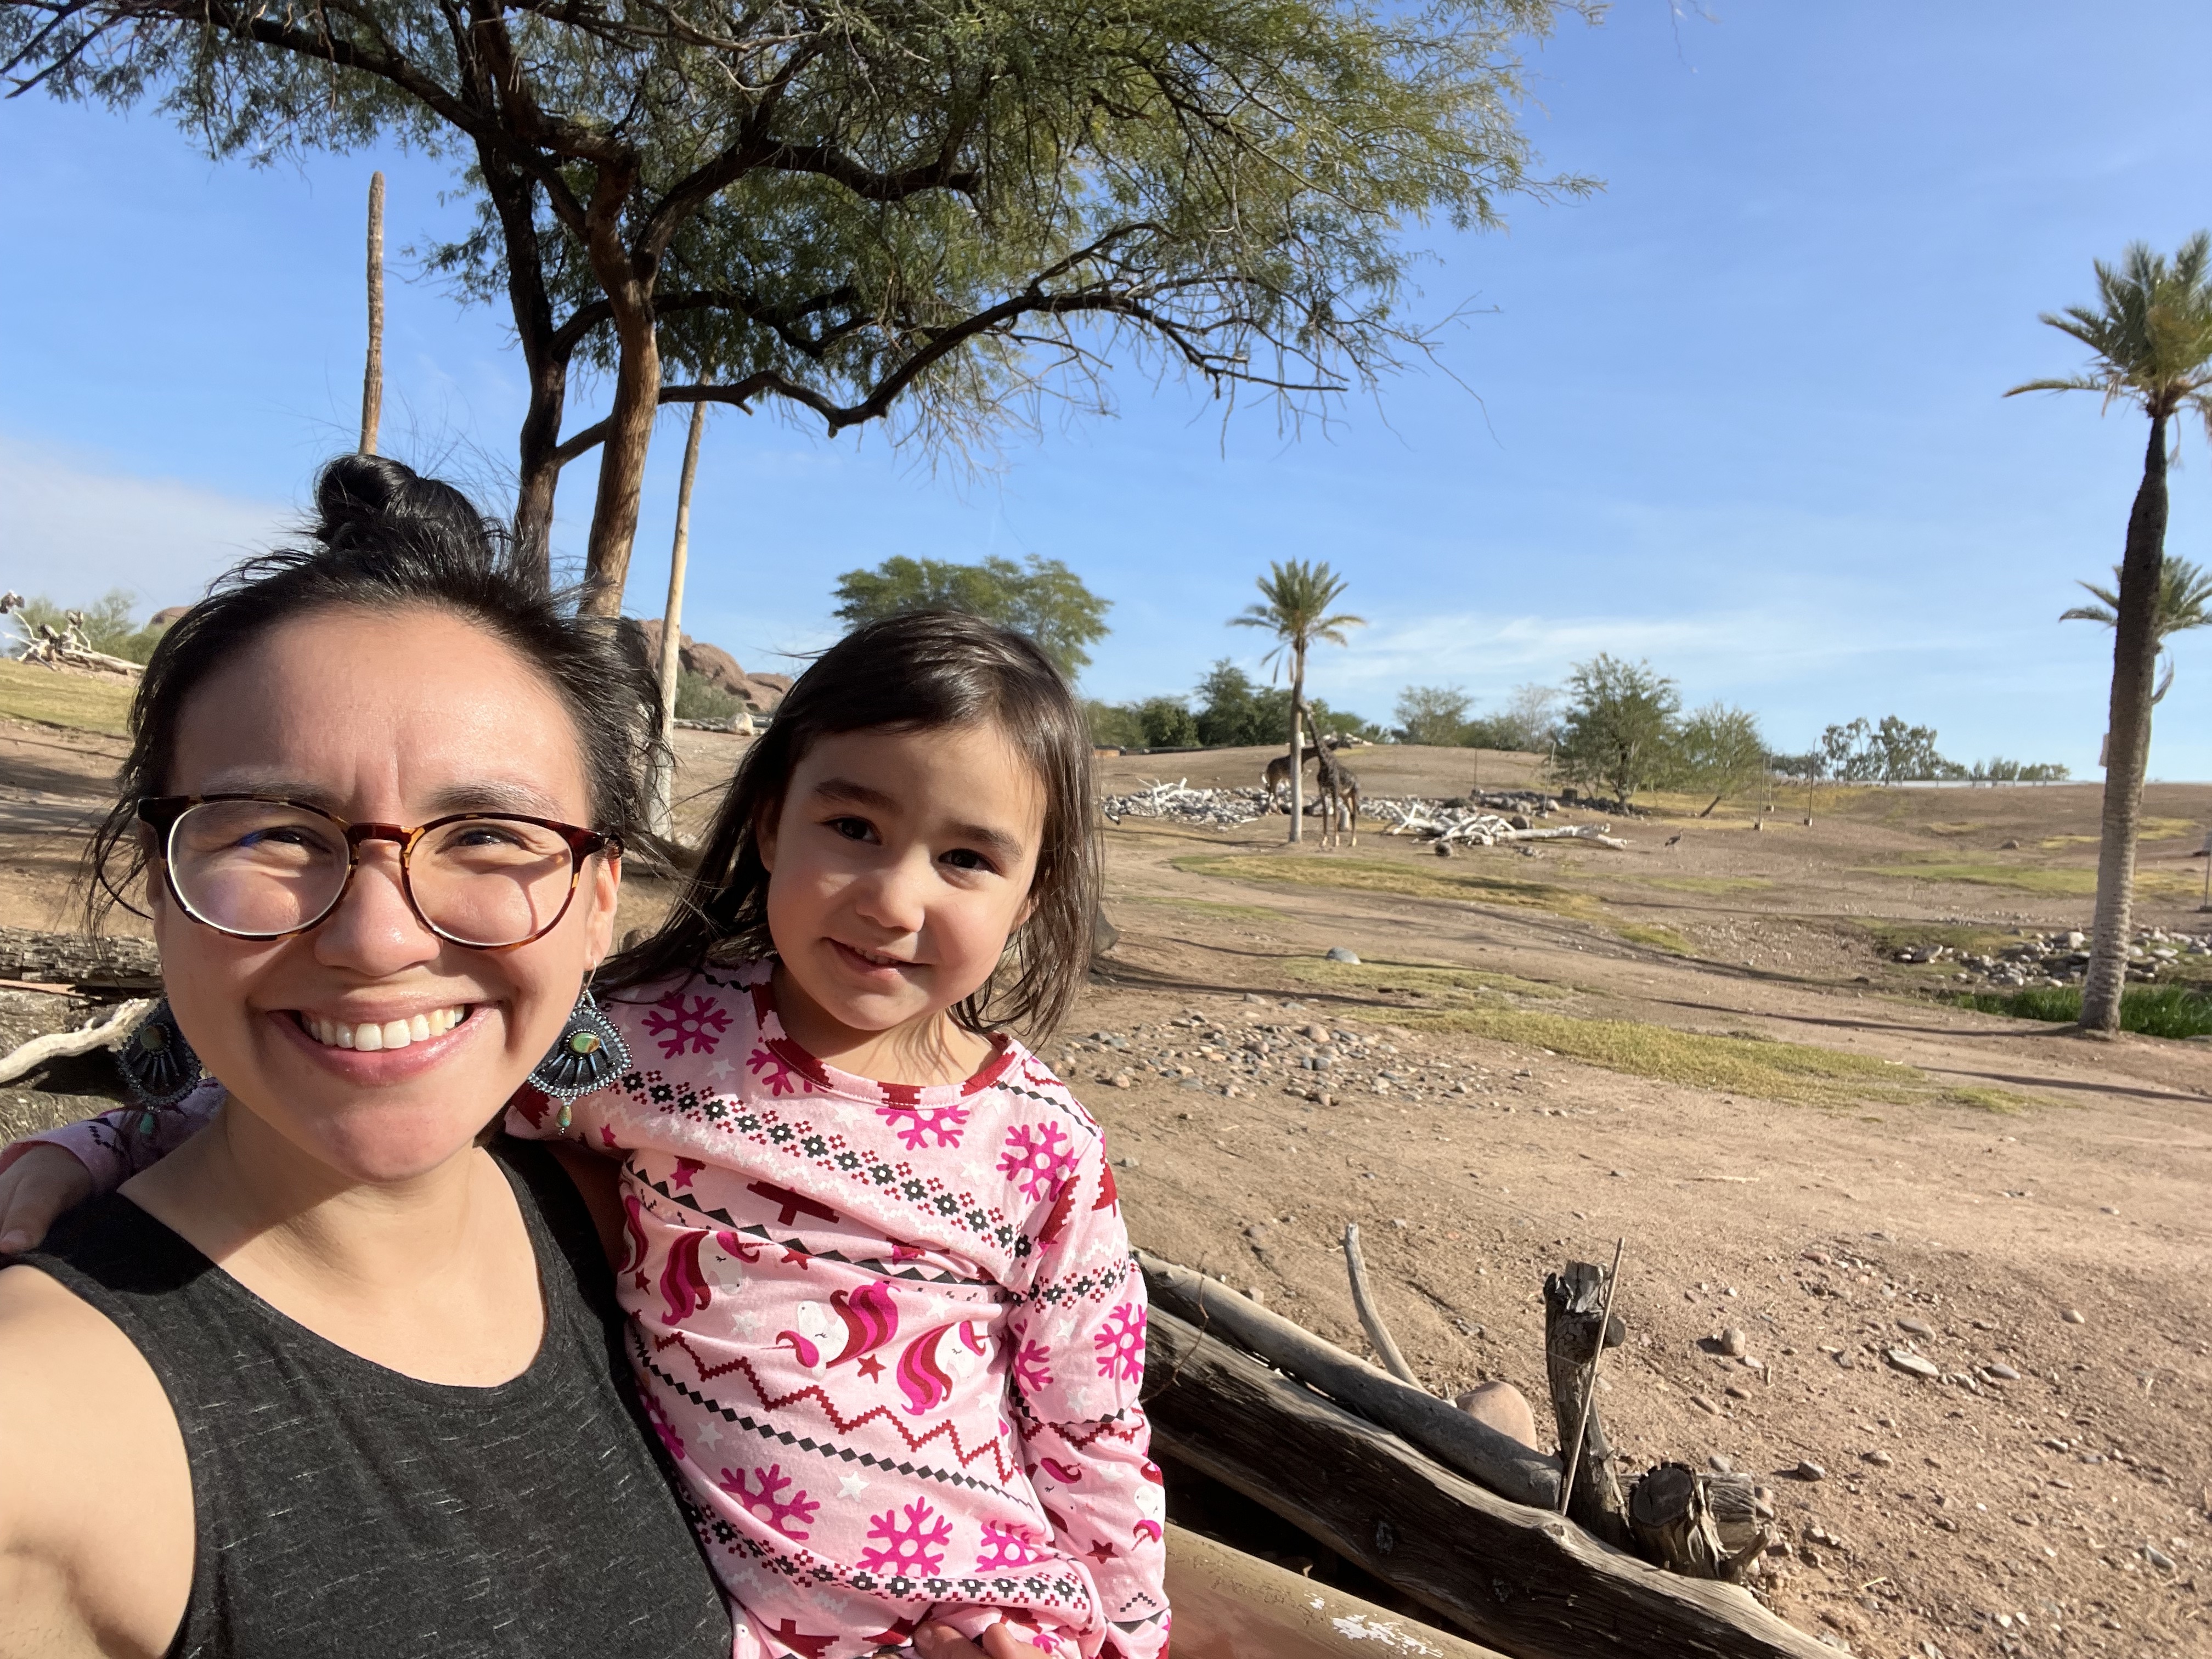
Sydney & I at the Phoenix Zoo
Right next to the zoo is Papago Park where there are some great hiking trails, or you can go check out The Hole in the Rock. The Hole in the Rock is a super duper short hike and Sydney enjoyed the views. We didn’t explore the trails around Papago Park but if we visit Phoenix again we will definitely check them out.
Sydney & I enjoying the views from The Hole in the Rock
Prior to our visit to Arizona I booked a photo shoot with the talented Morgan of Prickly Pear Photography LLC. Morgan suggested we take our photos at the Desert Botanical Gardens and she picked a beautiful location. Sydney and my mother in law led the way through the Gardens. The boys were not as impressed as the ladies were but we enjoyed our time exploring the Gardens. Tickets were a little on the spendy side but they were worth it. Make sure you plan enough time to walk through it all, there is a lot to see.
And if you are ever in the Phoenix area and are needing an amazing photographer check out Morgan she was wonderful to work with!
Orson not impressed with the Desert Botanical Garden
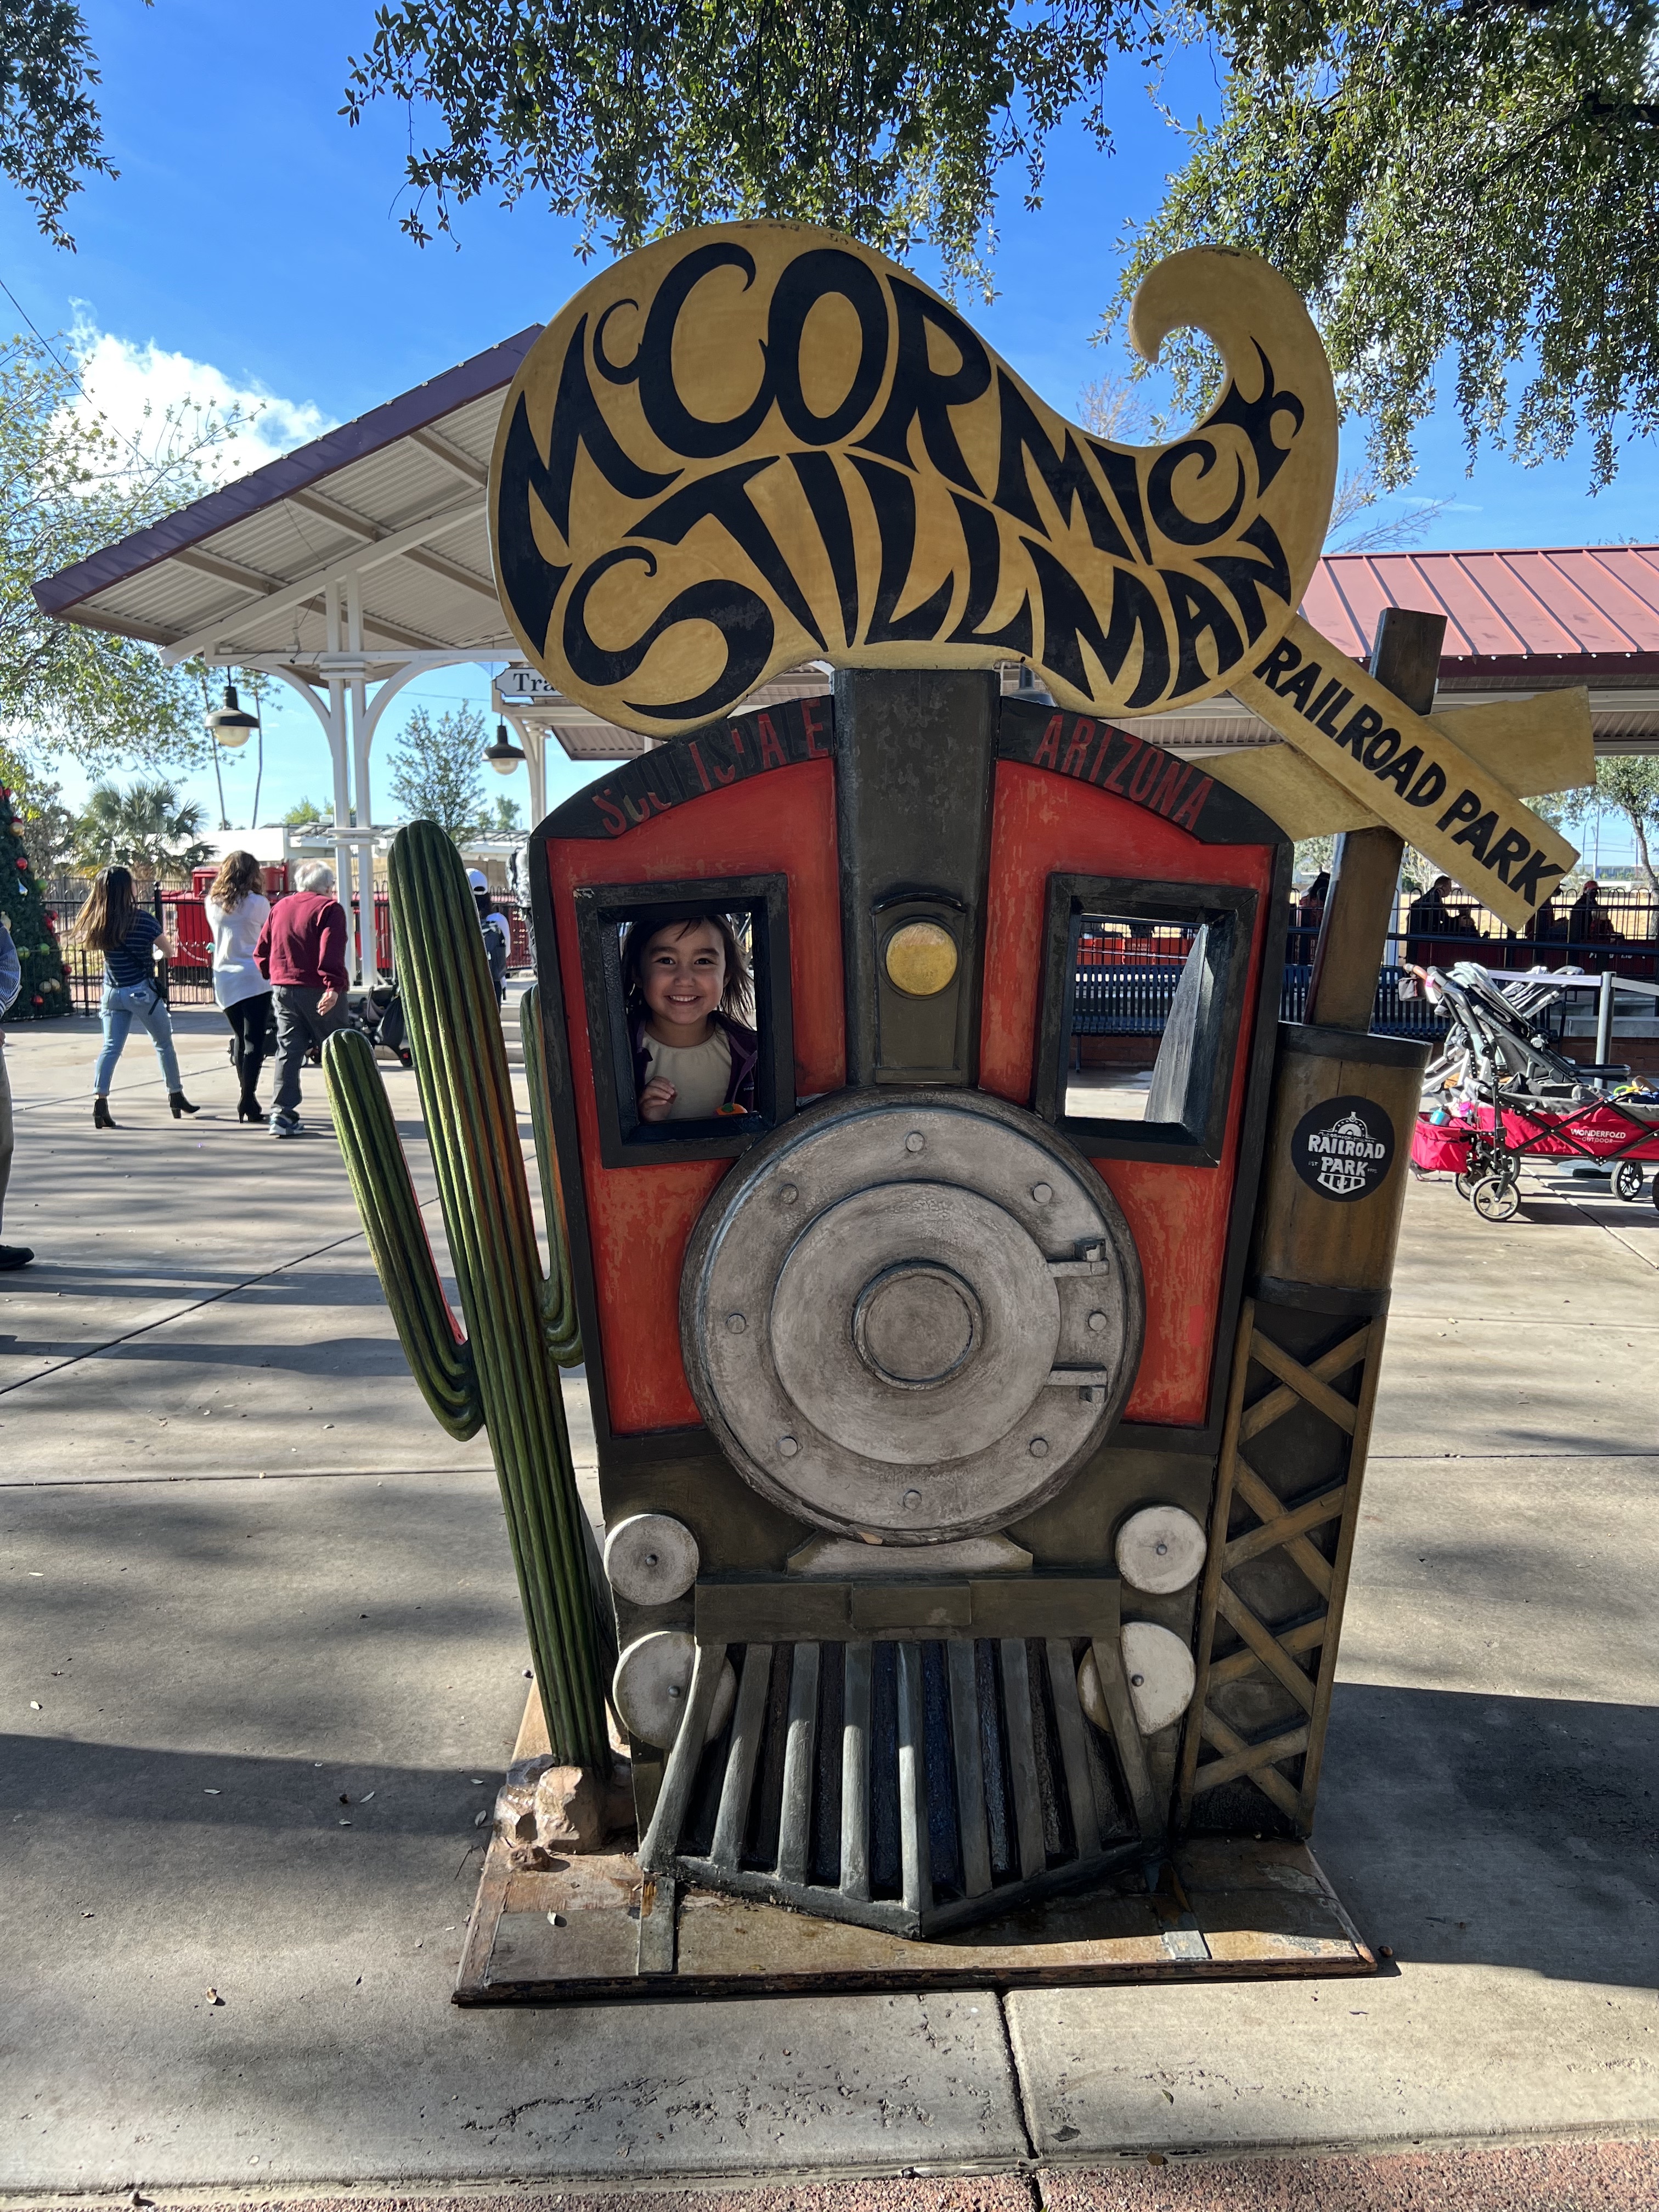
McCormick-Stillman Railroad Park was a fun little park to explore with Sydney and Orson. The railroad ride and carousel ride were inexpensive and the kids enjoyed the rides. Sydney also had a blast playing at the park. This was a great little park to explore.
Sydney at the McCormick Stillman Railroad Park
The Butterfly Garden was a neat place to explore, it was a little spendy but Sydney loved walking around with the butterflies. I don’t know if it was worth the amount we spent there are no children rates, or Groupon options. If we were to go back to Phoenix I don’t think we would check it out again.
Sydney at the Butterfly Garden
Next to the Butterfly Garden is Odysea the Aquarium. Be sure to check out the bathroom before going upstairs, it is definitely one of the coolest bathrooms we have been in. Again the tickets to the aquarium were expensive and if we were to go back I don’t think we would visit here again. There was no Groupon option or children ticket options. Sydney had a blast exploring the Aquarium and she loved the Tide Touch Pool.
Sydney at Odysea
Goldfield Ghost Town in Apache Junction is a fun place to explore. If we didn’t have the little ones we might have went on one of the tours. But walking around and seeing one of the shows was interesting and loud. A little piece of advice do not stand too close when they start the show if you have sensitive ears like me.
Exploring Goldfield Ghost Town
Two hikes that we were able to explore were Piestewa Peak and Tom’s Thumb. Both hikes were pretty intense with two little ones. We made it about halfway up for both which is pretty impressive for Sydney considering these were her first two hikes. And Orson just added an additional 20 lbs to my hikes but they were both beautiful. The next time we make a visit hopefully we can make it to the top with both kiddos.
Stan-O enjoying Tom’s Thumb Sydney summiting Piestewa Peak
And if for whatever reason you find yourself celebrating Christmas near Glendale check out Glendale Glitters. Or any light shows for that matter. Sydney and I had blast wandering around checking out all the Christmas lights set up in downtown Glendale.
Syd and I exploring Glendale Glitters
As far as places to stay we loved staying in Scottsdale. And if you ever need a beautiful place to Airbnb please check out Mindy’s place in Scottsdale. Our place in Scottsdale was close to great hikes, restaurants, and shopping. If we find ourself in Arizona again we will definitely be saying in this area again.
Our Airbnb in Scottsdale
Last but not least if you are wanting to eat the best tacos in the world you NEED to go check out Cocina Madrigal. They have thee most amazing tacos I have ever eaten in my entire life. The beef tenderloin steak is marinated in the most delicious pomegranate marinade and cooked to perfection. The tacos were so good we had to eat them twice and I am drooling just thinking about them. You will not be disappointed. Do yourself a favor and if you ever find yourself in the Phoenix area you will go grab yourself some tacos, maybe an elote and some delicious chips and salsa!
The best steak tacos I have ever eaten
And that’s it for all my recommendations for if or when you find yourself in the Phoenix area. I will post another blog on what you should and shouldn’t when it comes to traveling with kids. Our 10 day trip turned into an extended 17 day nightmare and there were plenty of things I wish I had purchased and looked into before we went on our family vacation. Overall we had a blast and made the best of it!
The zoom classes will be over three different weekends. The three weekends are:
November 27-28
December 4-5
December 11-12
The first two zoom classes will be traditional qaspeq classes. And the third class will be a modern qaspeq class. There will be three sessions over the weekend. There will be two (2) hour sessions on Saturday, and one (2) hour session on Sunday.
Students will need to provide their own material, and sewing machine.
The fee to participate in the class with $75 per person. And there will be at 15 person maximum capacity.
I will create three different events on Facebook for these events. If you do not have Facebook you can send me a message to sewyupik@gmail.com if you are interested in participating.
I wanted to create this post to prepare those of you who are interested in attending. Please do not ask me to remind you, or to message you when I post the events. I work full time, work part time, have two little ones at home, and my mom brain is in full force. I forget when I showered last so I am not a good person to ask to remind anyone. Sorry for the TMI but I want to be honest.
Materials needed for a traditional qaspeq:
3 yards for sizes XXS-XL with no skirt
3 1/2 yards for sizes XL and up with no skirt
Add 1/2 yard if you would like a skirt
2-3 packages of bias tape, trimming of your choice
I personally like using the extra wide double fold bias tape, and piping
Please let me know if you have any questions. Please keep an eye out for those events created on Facebook and it will have all the information on how to register for the classes.
Being a school nurse during this difficult time has been unbearable at times to the point that I am breaking into a million pieces.
I cherish my times with the students and generally love every aspect of being a school nurse. But now it has been so hard that I get physically sick to my stomach every morning when I drive to the school. Being yelled at daily is normal. Most times its more than once.
It is all out of my control.
I don’t have control over the school policies. I am not making up any nilly willy rules just because it’s fun and I feel like it. I want students in school just as much as the parents. We all saw how last year students suffered mentally and emotionally because they were not socializing. It was tough. For every single one of us and some more than others who have lost a family member, friend, coworker. I get it. I too have lost family members to COVID related illnesses and it sucks.
It is not hard to be kind. It is not hard to be empathic or sympathetic. We are all doing our best. Most days I am prepared to be yelled at and that is the shittiest feeling in the world. But today is not one of those days.
So please be kind. It’s not hard. And I hope that you can find joy. Life is too short to be angry.
Here are my two littlest investors and I am going to share how I am setting them up for success. First and foremost I am not a financial advisor and by no means an expert but I am sharing what I know and have learned in my investing journey.
I first learned about 529’s at a young age when my father started putting my Permanent Fund Dividend (PFD) in my own account. He was also gracious and put half of his PFD in my 529. A 529 is a tax-advantaged savings plan designed for future educational expenses. The only downside to a 529 is that the funds can only be used for educational purposes. It may not work in your favor if your child does not have plans on attending college, or a vocational school. I am not planning on investing huge amounts into each of my children’s accounts. With each of their PFD’s half of the funds will go into their accounts and the other half will be invested in their UTMA which is a Uniform Transfers to Minor Act.
My children who are 4 years old and 6 months old each have an account for their 529’s with Alaska 529 which is associated with T.Rowe Price. There are many other websites that offer 529 plans make sure you do your research. I chose Alaska 529 because my children’s PFD’s can be deposited directly into their accounts.
Now I chose to open UTMA accounts for my children because I can invest in Mutual Funds, ETF’s (exchange traded funds) and individual stocks. With a UTMA I am able to invest as little or as much as I prefer up to $13,000 per year per child. I chose Vanguard to open their UTMA’s because I have been a Vanguard investor for the last 10+ years and I like how their website is user-friendly also their funds have low expense ratio’s.
Creating an account on Vanguard is fast and easy. Once you decide which account you want to open with them then it takes a couple days for the funds to hit the account. Once you see the funds in the Vanguard Federal Money Market Fund the key is moving those into a mutual fund, index fund, or individual stock. You do not want those funds to sit in the Vanguard Federal Money Market Fund because they will not start accruing that compound interest.
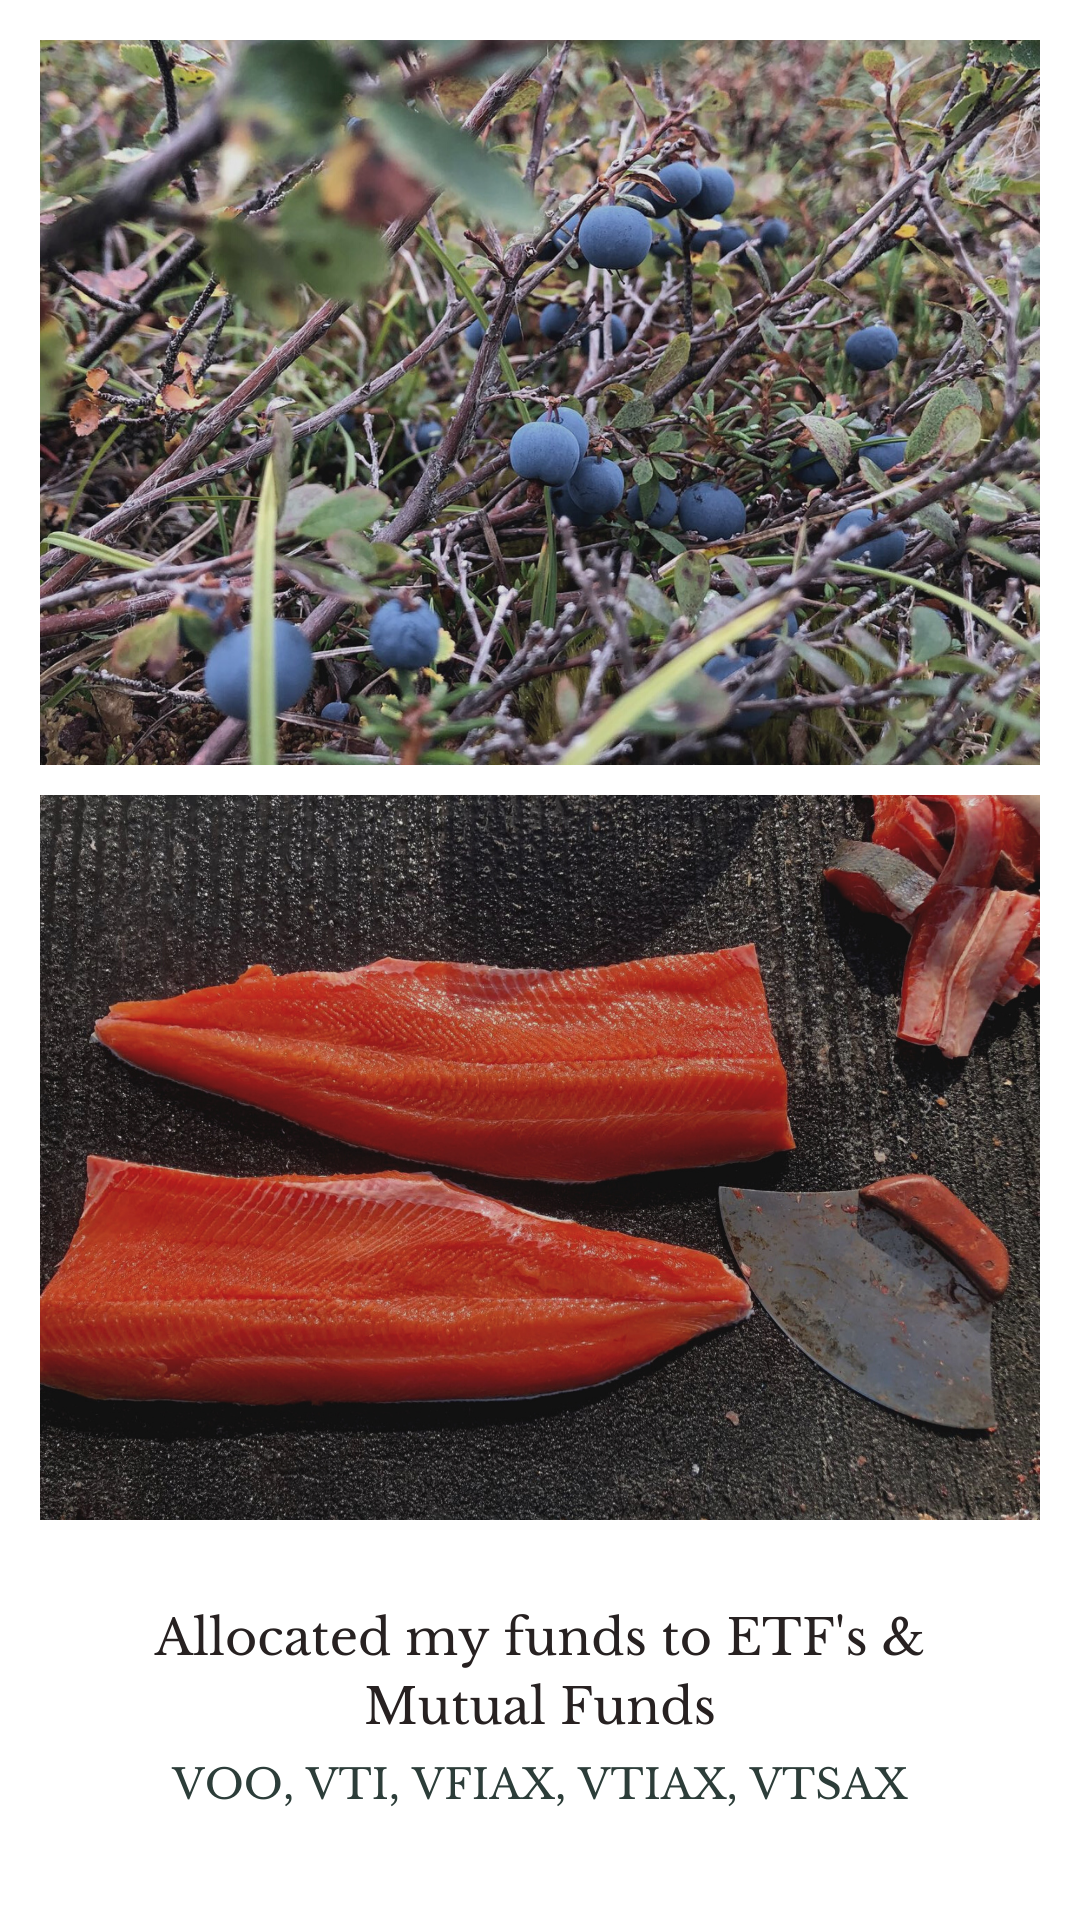
When it came to selecting funds for my children my go to tickers have always been VOO (Vanguard S&P 500 ETF), VTI (Vanguard Total Stock) and VTSAX (Vanguard Total Stock Market Index Fund Admiral Shares). The key to choosing funds is selecting ones that have a low expense ratio. I prefer funds that have an expense ratio of 0.10% or less any more than that you are losing out on free money.
If all this is another language to you and confusing I recommend checking out Personal Finance Club’s website Jeremy does an amazing job of explaining all of this in simpler terms. At the beginning of the year I knew that I wanted to learn more about investing and the stock market. I went head first and started watching hours of YouTube videos, researching the web and then started stumbling across great finance accounts on Instagram. If I can start, you can do it! Sure, it can be scary at first but the scarier thing is not starting. If you have funds sitting in a bank account and you are not sure what do with it I suggest you start researching investing. And if you are scared to put it into the stock market look into HYSA (High Yield Savings Accounts) at least allow your money to work for you.
My goal for my children is to set them up for success and allow them to have that financial freedom that I am working hard to create for myself. I am working on that generational wealth. Money should not be a topic that is taboo it should be something that we discuss with our children at a young age. I know that when my daughter is old enough I will allow her to choose her own stock to invest in for her birthday present. For now mama will invest in one stock for her each year and right now mama is liking AAPL (Apple).
And if you have any questions don’t hesitate to reach out I am willing to share what I know to help others. I hope that this post was helpful and if you enjoyed it please feel free to leave me a comment. Quyana Chuck Norris!
I am going to highlight each of these slides and how I began my financial journey. First and foremost I am not a financial advisor, this is not financial advice. I am merely sharing what I have learned on my journey since getting my finances in order. In the early 2010’s I opened a Roth IRA with Vanguard. I set up automatic monthly investment to my Roth IRA for a few years. And then life got in the way and I was not able to contribute and stopped. This January 2021 I got serious about my finances and investments and went down the rabbit hole of investing, cryptocurrencies, various side hustles, and learning everything anything money.
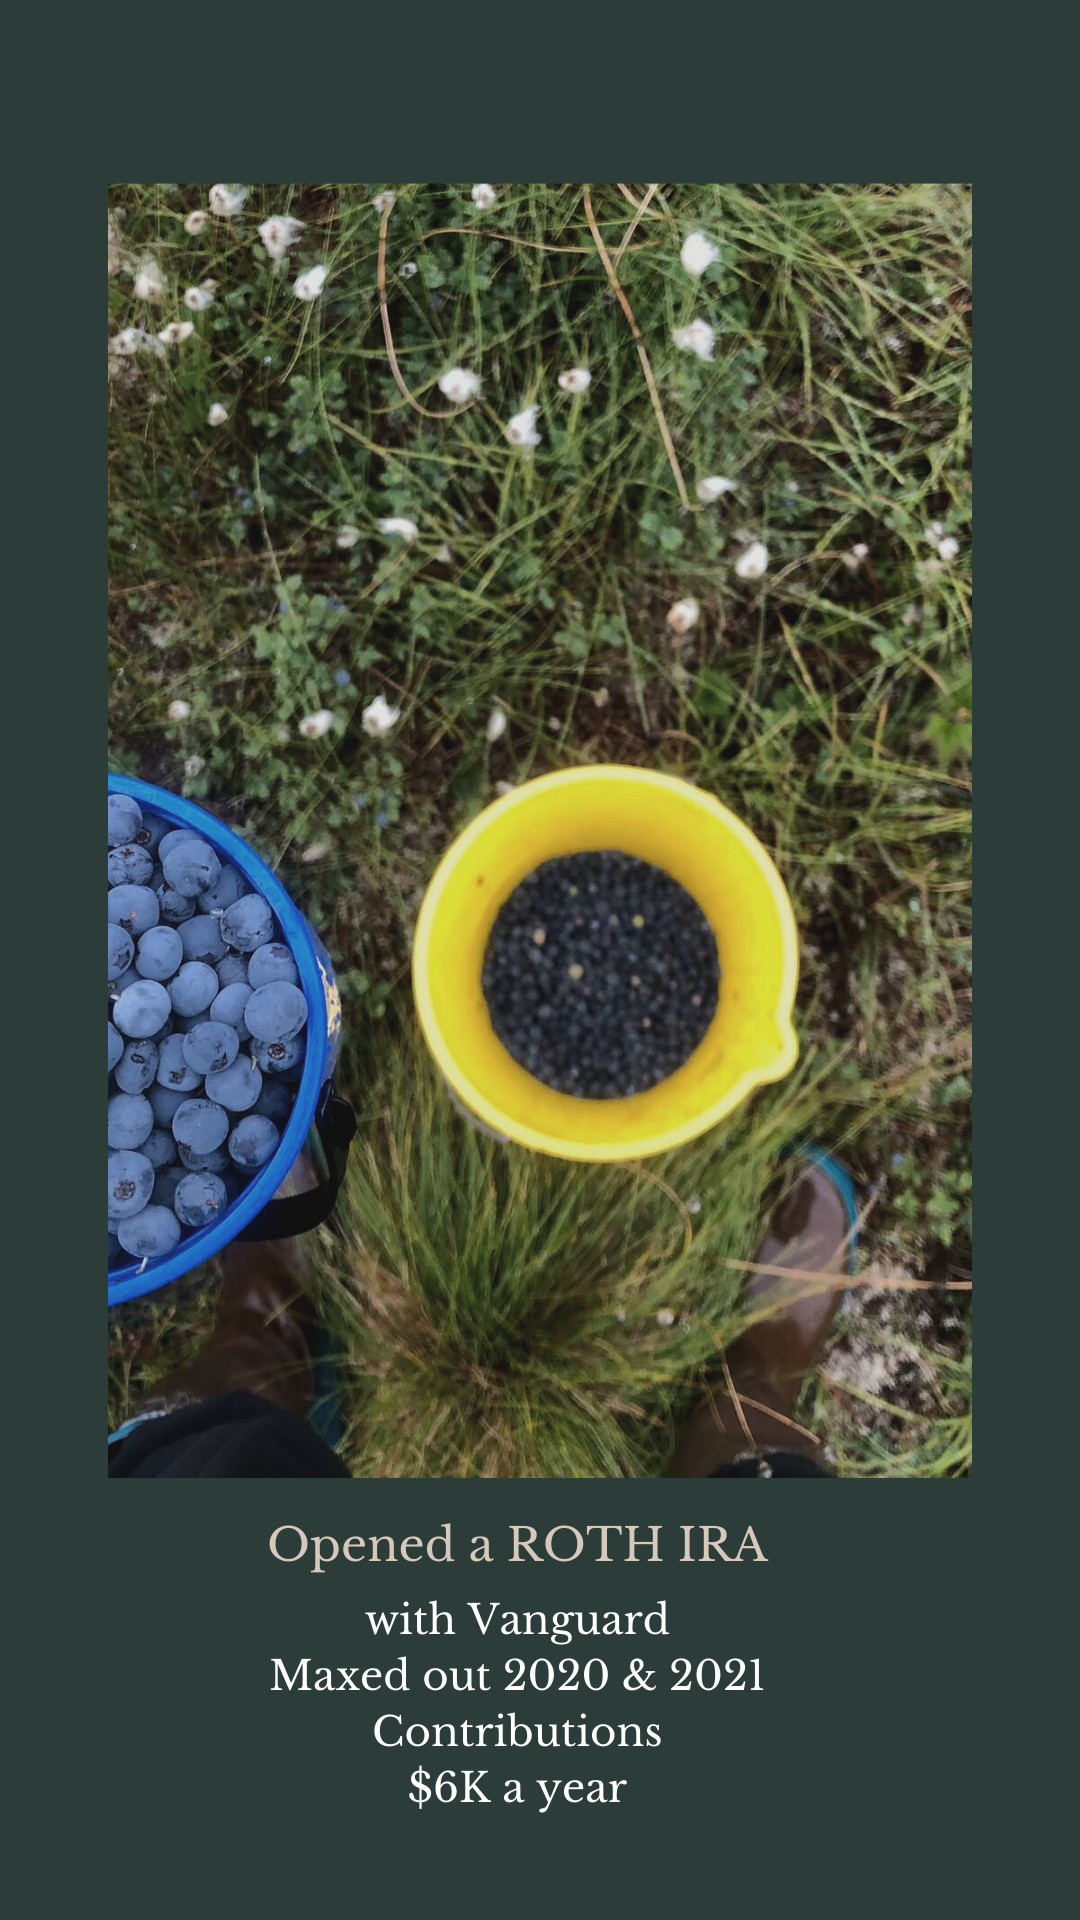
In January I opened up my Vanguard account and familiarized myself with my Roth IRA again. My funds had been allocated in mutual funds that had HIGH expense ratios. I moved my funds to ETF’s (exchange traded funds) and mutual funds with low expense ratios such as the S&P 500, Total Stock Market Index, and Total Stock Market International. The specific funds that I invest in are VOO, VTI, VFIAX, VTIAX, and VTSAX. Again these are my personal investments and this is not financial advice. The maximum amount that you can contribute to a Roth IRA is $6,000 per year. The deadline to contribute is when taxes are due which is typically April 15th. Make sure when you contribute to your Roth IRA, brokerage account or rollover IRA that you move the funds from the Federal Money Market and invest it in a specific ETF (exchange traded funds), mutual fund, or individual stock. Do not forget to do this step otherwise your money will not work for you.
Along with ETF’s and mutual funds I also invest in individual stocks. The stocks that I invest in are things that I use everyday such as my Apple, Disney, Etsy, and other things that I use on the daily. I also have researched and invested in other various stocks that could potentially become beneficial down the road. Those specific stocks are in the renewable energy sector and other areas. I spend at least 30 minutes everyday and try and learn about something new with regards to investing, the stock market, cryptocurrencies, and anything and everything related to investing!
With my Employer Retirement Account when I initially opened it I apparently opted to have a financial company allocate my funds. I was scared for the longest time to move it around because I wasn’t sure what to do or what funds to pick out. And honestly I thought it would be complicated to do. I finally found the courage and time and opted out of that service and allocated a majority of it into an S&P 500. The other smaller portion I invested into an International Equity and World Equity fund. I also contribute the maximum amount that my employer will match.
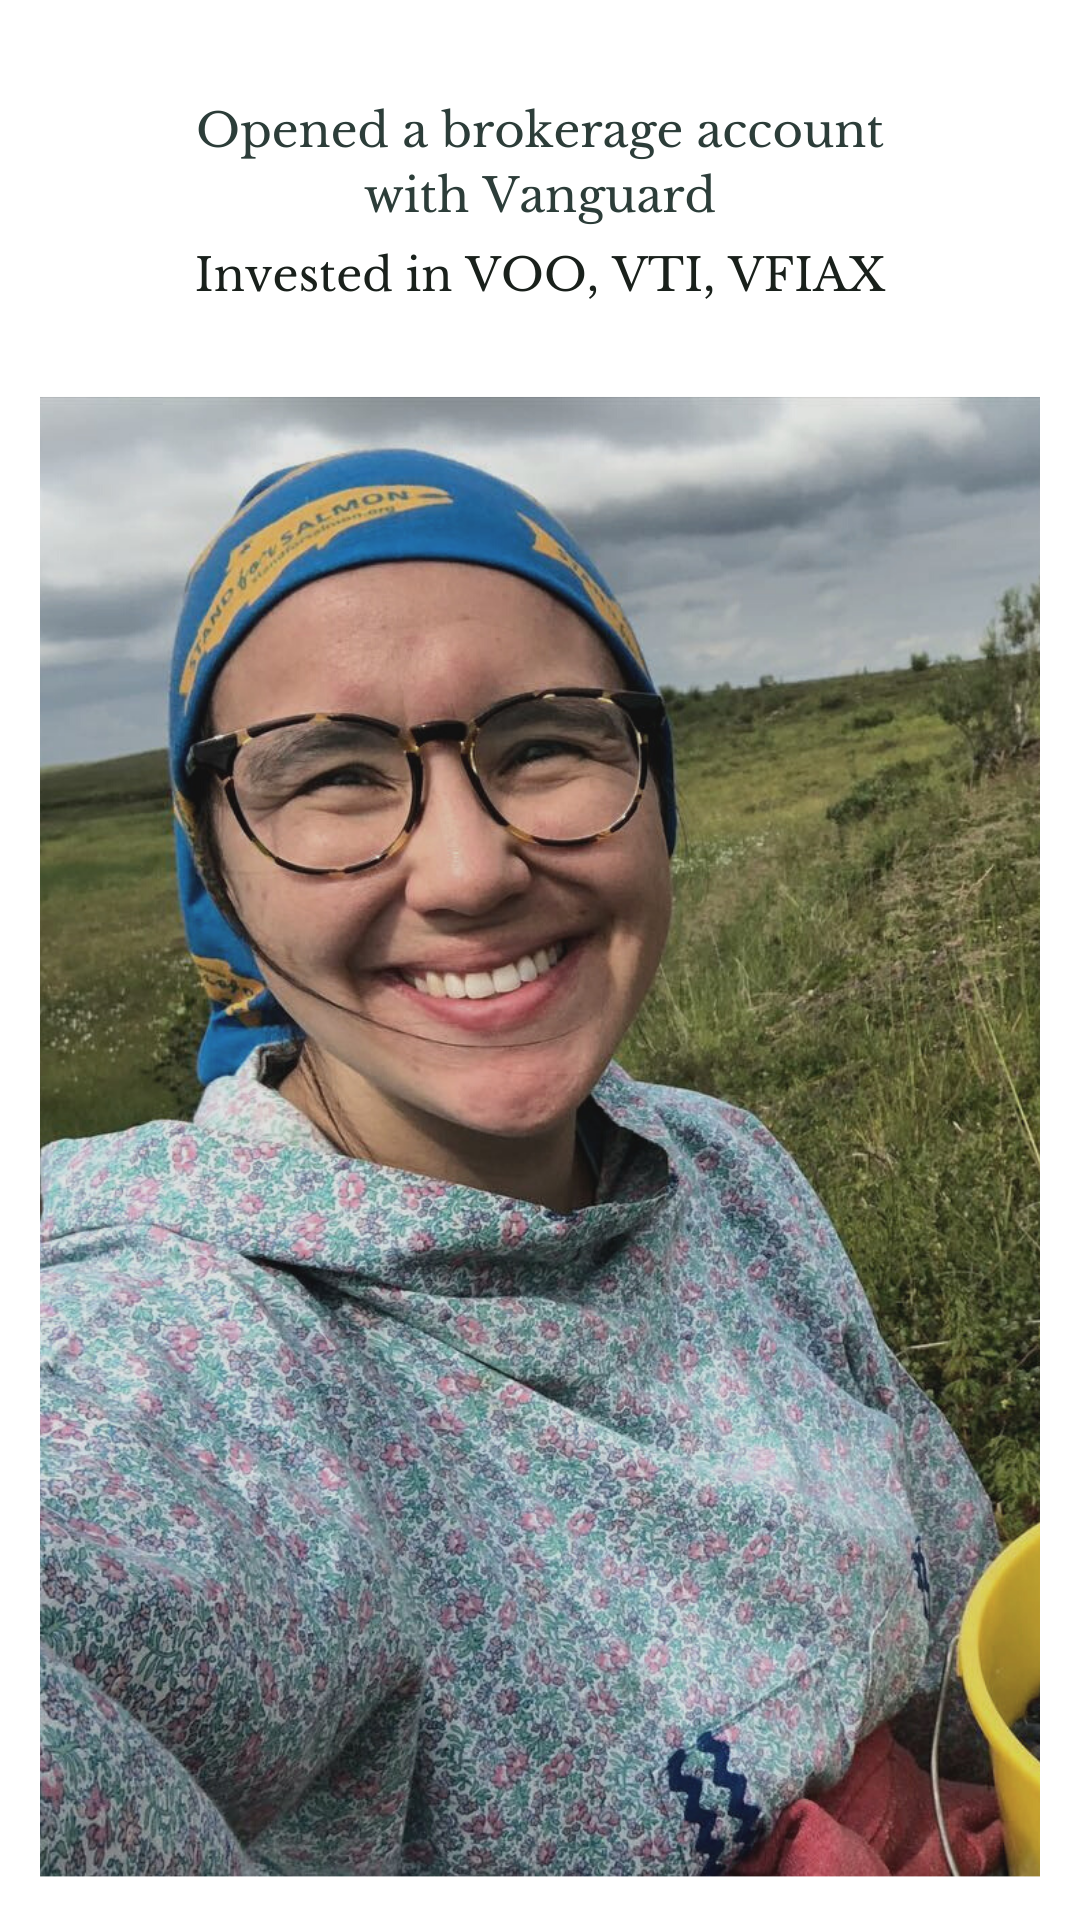
After maxing out my Roth IRA for 2020 and 2021 I opened up a brokerage account. I will not do justice by trying to describe a brokerage so I am sharing a link to Personal Finance Club’s blogpost created by Jeremy. Click HERE to get to the post regarding what a brokerage account is. In my brokerage account I invest in VOO, VTI, VFIAX. I also invest in other individual stocks and ETF’s.
I also rolled over two of my old employer retirement accounts from when I worked at the Yukon Kuskokwim Health Corporation. I had around $100K that I rolled into a Vanguard Rollover IRA. Back story I worked at YKHC for over 10 years and I don’t remember when I started my retirement account with them but I am thankful that I did. I just recently rolled over the $100K to my Vanguard and just finished allocating it today. I had a little more fun with a small portion of it and invested it in some risky stocks. I also have one more old employer retirement account that I need to rollover. Once I roll it over to my rollover IRA I will look into a Backdoor Roth IRA and see if I can do that. Again I will not try and explain what a Backdoor Roth IRA but click HERE. Jeremy from Personal Finance Club does an excellent job explaining what it is.
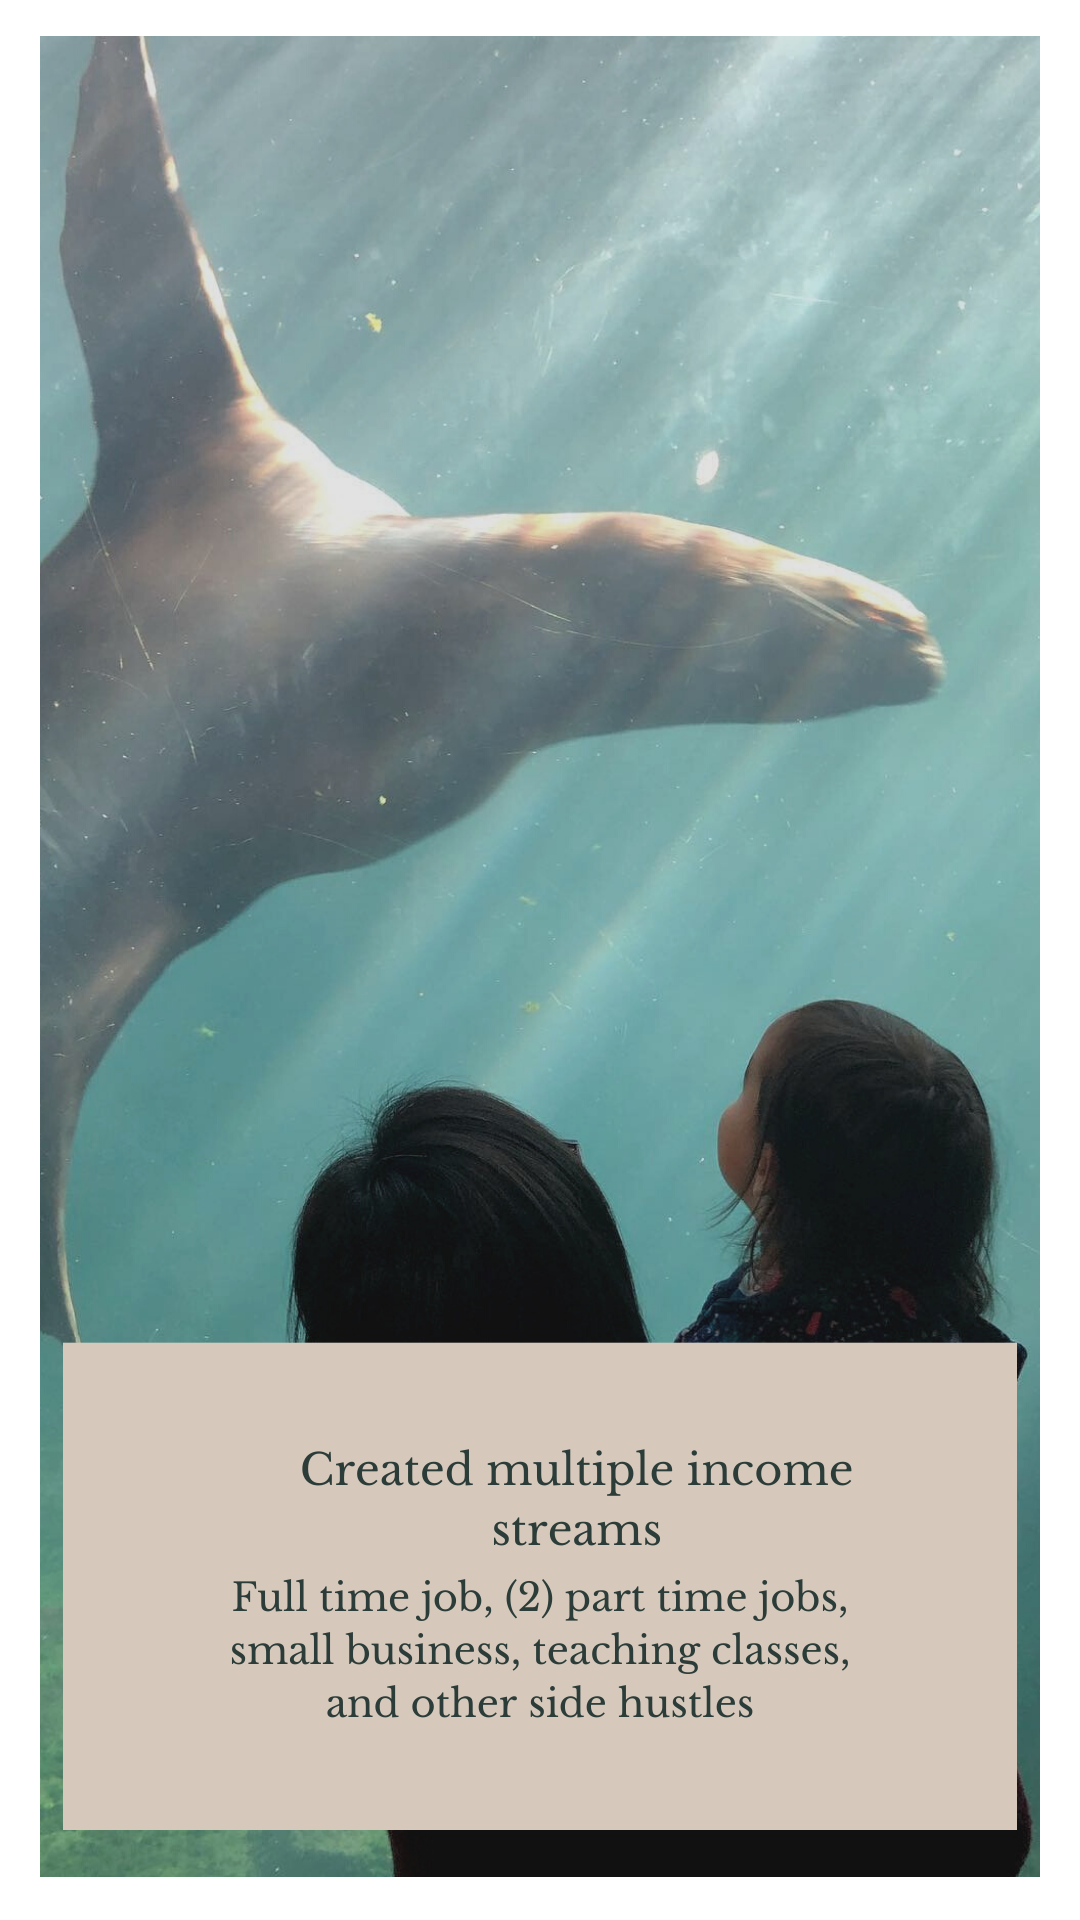
I work full-time as a School Nurse. I had two part time jobs at one point as a Contact Tracer. I have my small business Sew Yup’ik. I teach classes via Zoom and in-person. And I try to find any and every single side hustle there is out there. I am currently in the process of going down the rabbit hole and researching Turo a car sharing company. I am also looking into ways that I can monetize my Sew Yup’ik Youtube channel, and my Sew Yup’ik Instagram page. Like I said I love to learn anything and everything if it helps me to become financially independent.
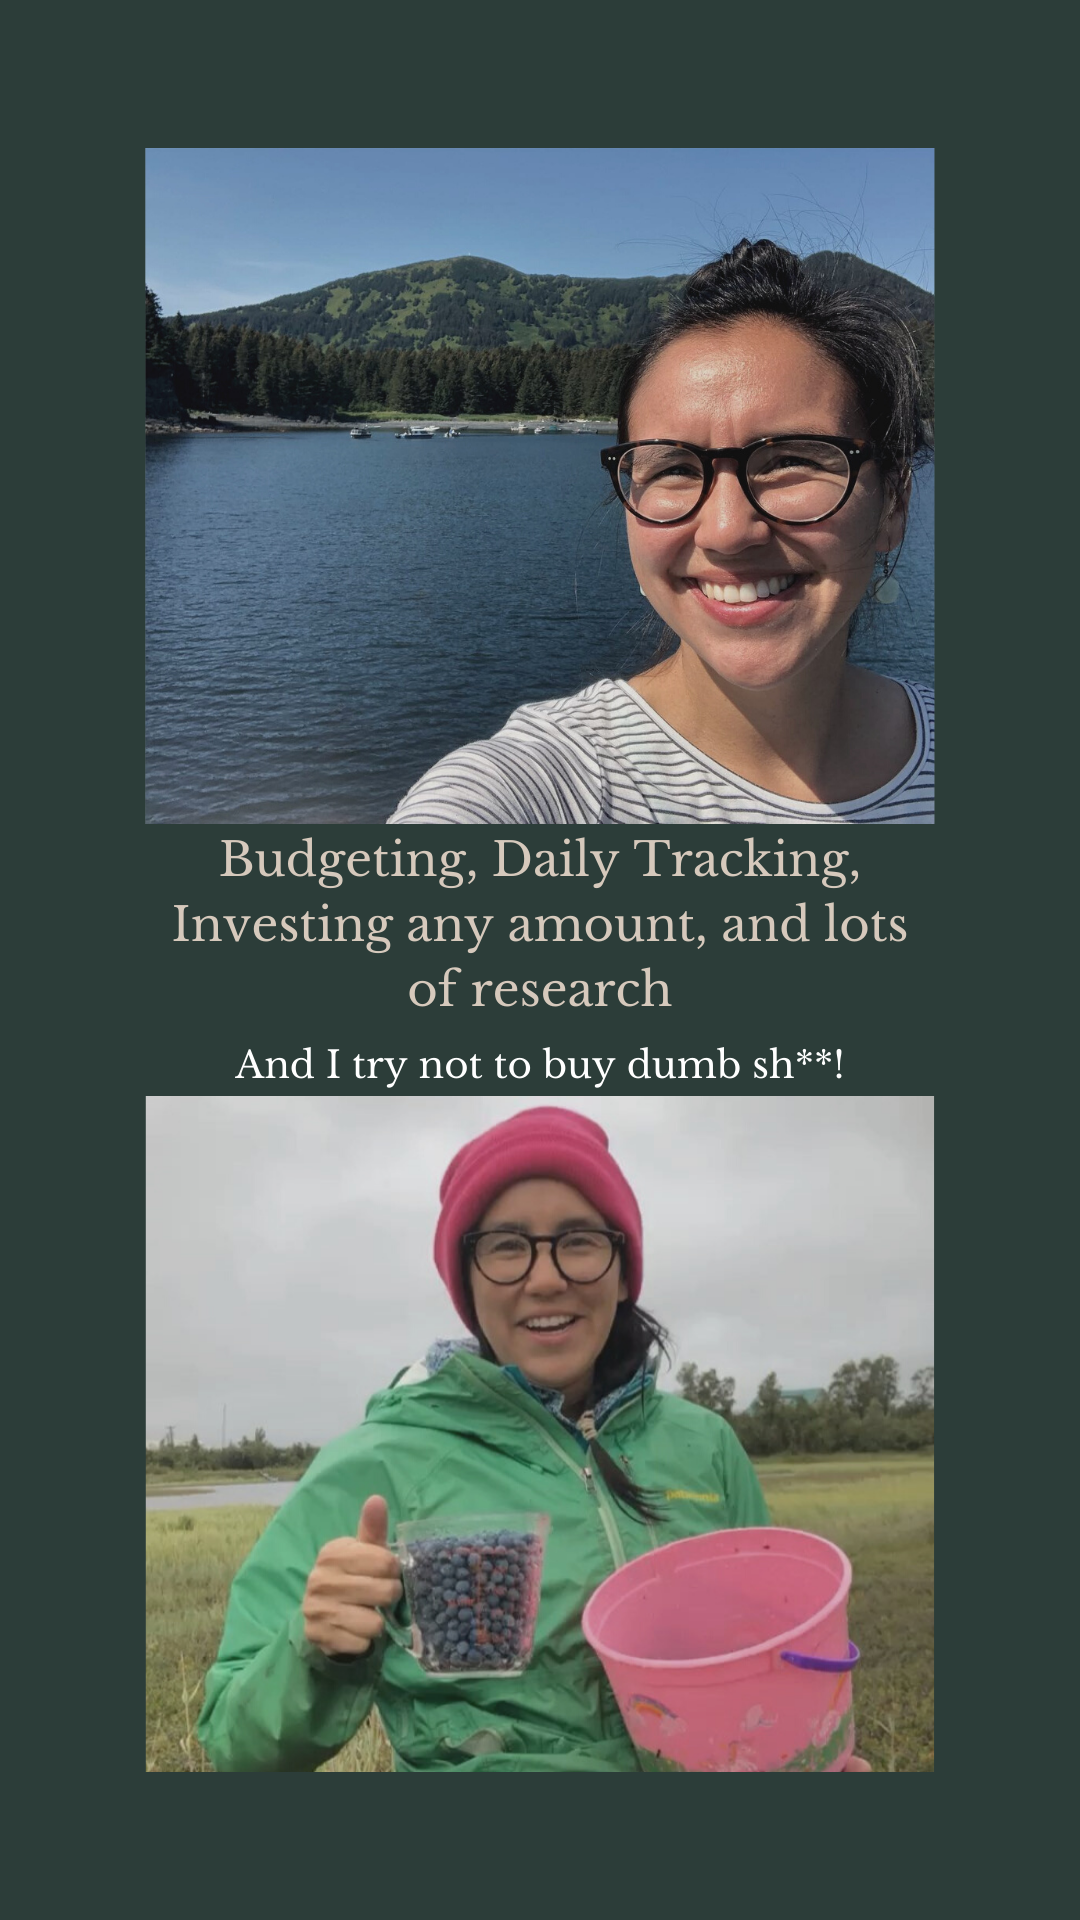
I would not have gotten serious about my finances, budgeting and daily tracking if it was not for stumbling across The Budget Mom’s Instagram page. I started following The Budget Mom in 2019 and got serious about daily tracking my finances and budgeting. When I started following her I had $81K in debt with my student loans and car loan. I started tracking my daily finances. I created monthly budgets. Challenged myself to no spend days. And threw whatever I could to my student loans, and car loan. I was able to pay $71K of my loans and still have $10K left of student loans. I could be paying it off but instead I am choosing to invest that. I am also secretly hoping President Biden will cancel some student debt haha but I won’t hold my breath. My goal is to reach Coast FI meaning that I want to invest enough money so that it can work for me and I will not have to invest another penny down the road. Again I wont explain it but check out this blogpost from Personal Finance Club on what Coast FI means.
All of this information is what I have done for my financial journey. I will continue to educate myself and keep going. My ultimate goal is to work when I feel like it and set my own schedule. I hope that this information is helpful. If you have any questions comment below. If you are not following me on IG or FB head over to my Sew Yup’ik pages I share a lot of my information on those platforms. And again my motto as always is don’t buy dumb sh**.
Please let me know if you would be interested in a post regarding my children’s accounts.
I am going for it. I am applying for a Family Nurse Practitioner Program. When I finished nursing school in December of 2018 I was convinced that I needed that I needed to have an actual real nursing job before I applied to a Nurse Practitioner program. It has always been a dream of mine to be a Emergency Medicine Nurse Practitioner and return back to the YK Delta and work in the sub-regional clinics to provide care to the Yup’ik communities. Growing up in chaos has always had me preparing and overly preparing for the next step. It doesnt matter if I am driving, preparing for a test, anything I am always going over in my head what road I will take, when I will turn left, what lane I will be driving in, and when I will turn my blinker on. I have always prepared myself for my next move no matter what. When I would have surprises occur in my life I would panic and freak out. My body would go into a fight or flight reaction and I would always fight because that is what my body was used to. When a crazy event would happen in my life growing up I would always fight and as an adult that would be my first reaction. So applying to FNP school after completing my BSN was not in my head.
This was taken after completing my BSN. I did not walk during graduation but instead snapped this to celebrate my completion of the program.
I always felt that I needed to have actual “real nursing” experience. And what I mean by nursing experience is inserting IV’s, foley catheters, assisting in codes, and all that hands on experience that I do not get on a day to day basis as a school nurse. After completing my BSN I thought that I wasnt smart enough. I didnt have the experience because I was only a school nurse and I felt that I needed that hands on before applying. However, as a school nurse I am getting that nursing experience just in a different way. I was not confident in my skills as nurse and I always felt that I needed “real” experience. I now realize that I am good enough. I have the experience. I can do it. And I will do it. I do not need to have worked on a Med-Surg Unit to apply to FNP. I do not need to have that hands on experience before applying because I will learn it while in school and through my clinicals. And I do have the experience I just dont have it as a nurse.
This was after completing my AAS in Nursing in December 2018. I started my program 6 months pregnant and graduated when she was 18 months old.
My love for the Emergency Room started in February in 2008 when I was hired on as an Emergency Room Technician. I loved it. I loved every aspect of the ER and I felt so comfortable. And that comfort was because of my childhood and growing up in chaos I craved chaotic environments. I strived in that environment and it felt like home. And in that time working in the ER I was accepted into nursing school the first time. But that first round of nursing school did not work in my favor. I was young, arrogant, and felt I knew better than the instructor and I had a hard time keeping my mouth shut. Thankfully, I was failed out of the program due to personality conflicts between myself and the instructor after the first semester. Looking back I was creating chaos for myself and instead of keeping my mouth shut I chose to argue back. It was a hard lesson for me to swallow but I am thankful that it happened. I have learned from it and I can say that I am thankful for that experience. I worked in the ER for almost 3 1/2 years and had plenty of hand on experience with assisting the nurses and providers. But because I wasnt a nurse during that time I always felt that experience wasn’t “good enough.” I know now that it is good enough. And I am good enough. I am confident in my skills, and I know that along the way I will learn those skills I need in school, clinicals and on the job.
My daughter Syd was a huge motivation to finish school and continue on my journey.
I felt a strong urge and incline to share my thoughts because if you are wanting to do something in your life and you are afraid to do it, DO IT!
Have the confidence in yourself to know that you can do it. Take the leap. Make that call. Apply for that program, job whatever it is. You are good enough. I am taking my own advice and taking that leap. Its scary. Really scary but I am comfortable and feeling confident in myself.
I have all the support in the world and I am so thankful for that. My husband has been my rock through everything. He was by my side when I was failed out of the nursing program the first time. He has watched me change jobs because I was never happy. He has always had my back and has been supportive no matter what. I am so thankful to have my best friend by my side pushing me to follow my dreams. Thanks boo.
And here is my husband who was supportive through everything and still is to this day.
I am excited and scared for this next chapter.
But I am ready. And I am confident in myself and I believe in myself. And I can do it!